


ILIAS Support (English)
Reiter
Manual: Learning Sequence
Deutsch | English
Manual: Learning Sequence
.
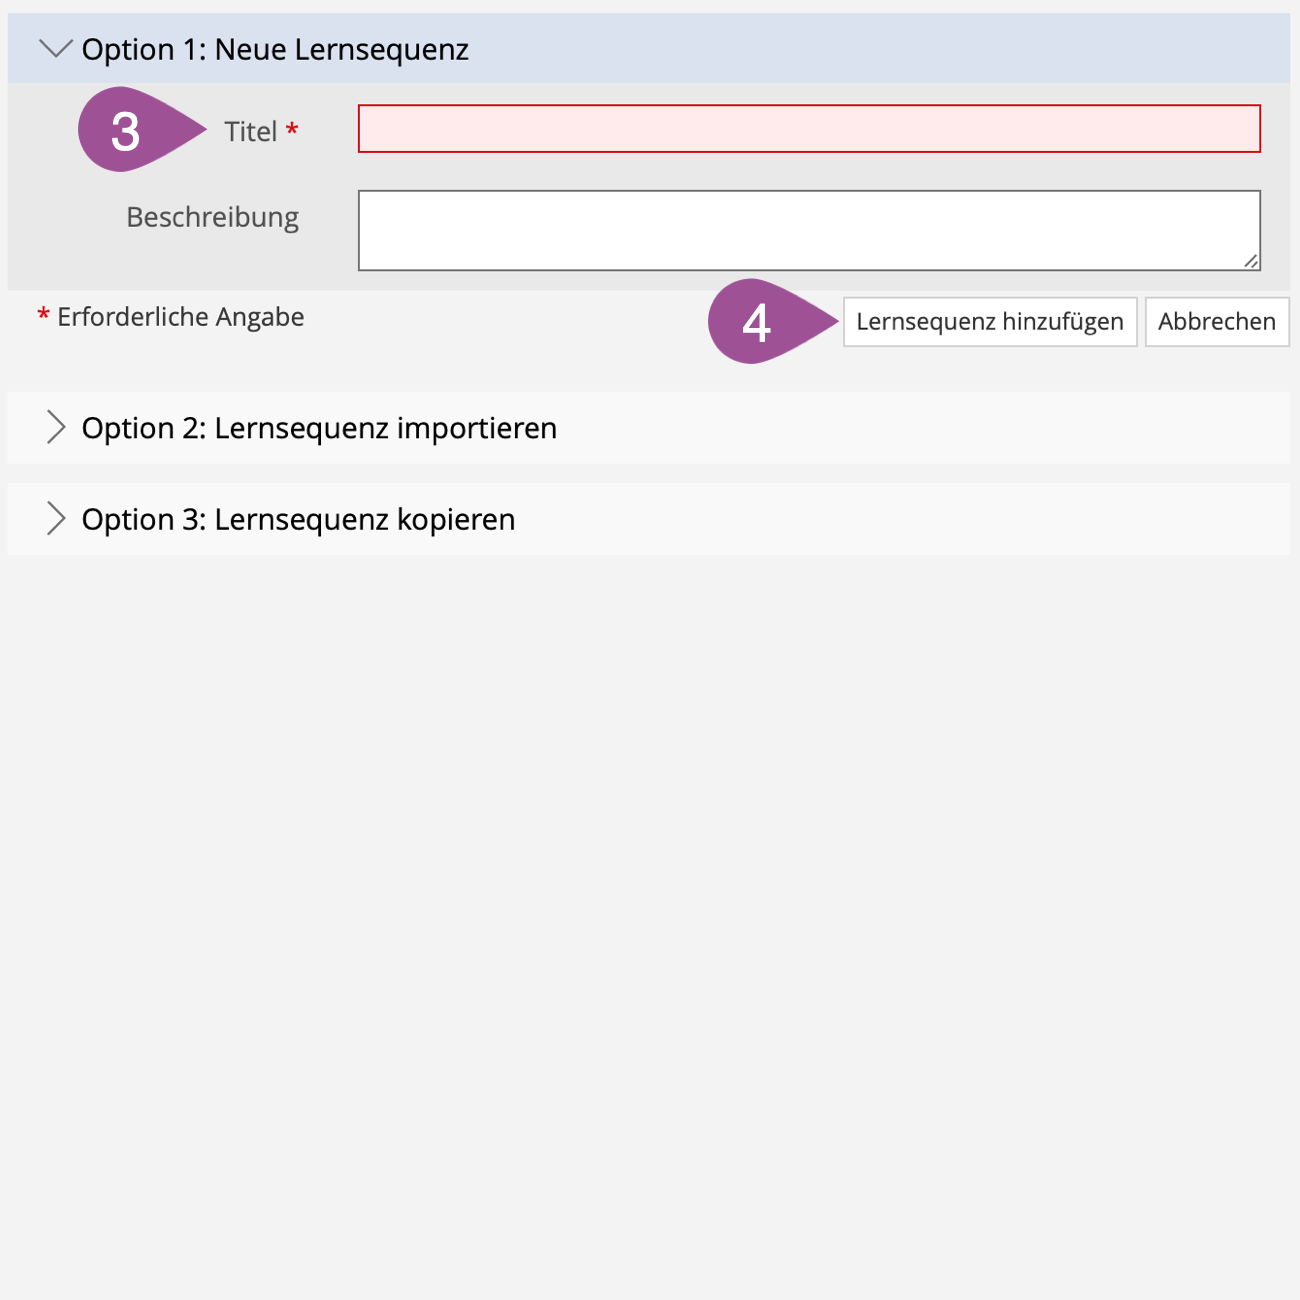
1. Create a learning sequence
 | Click on «Add New Item». |
 | Select «Learning Sequence». |
 | Give the learning sequence a «Title». |
 | Click on «Add Learning Sequence». |


.
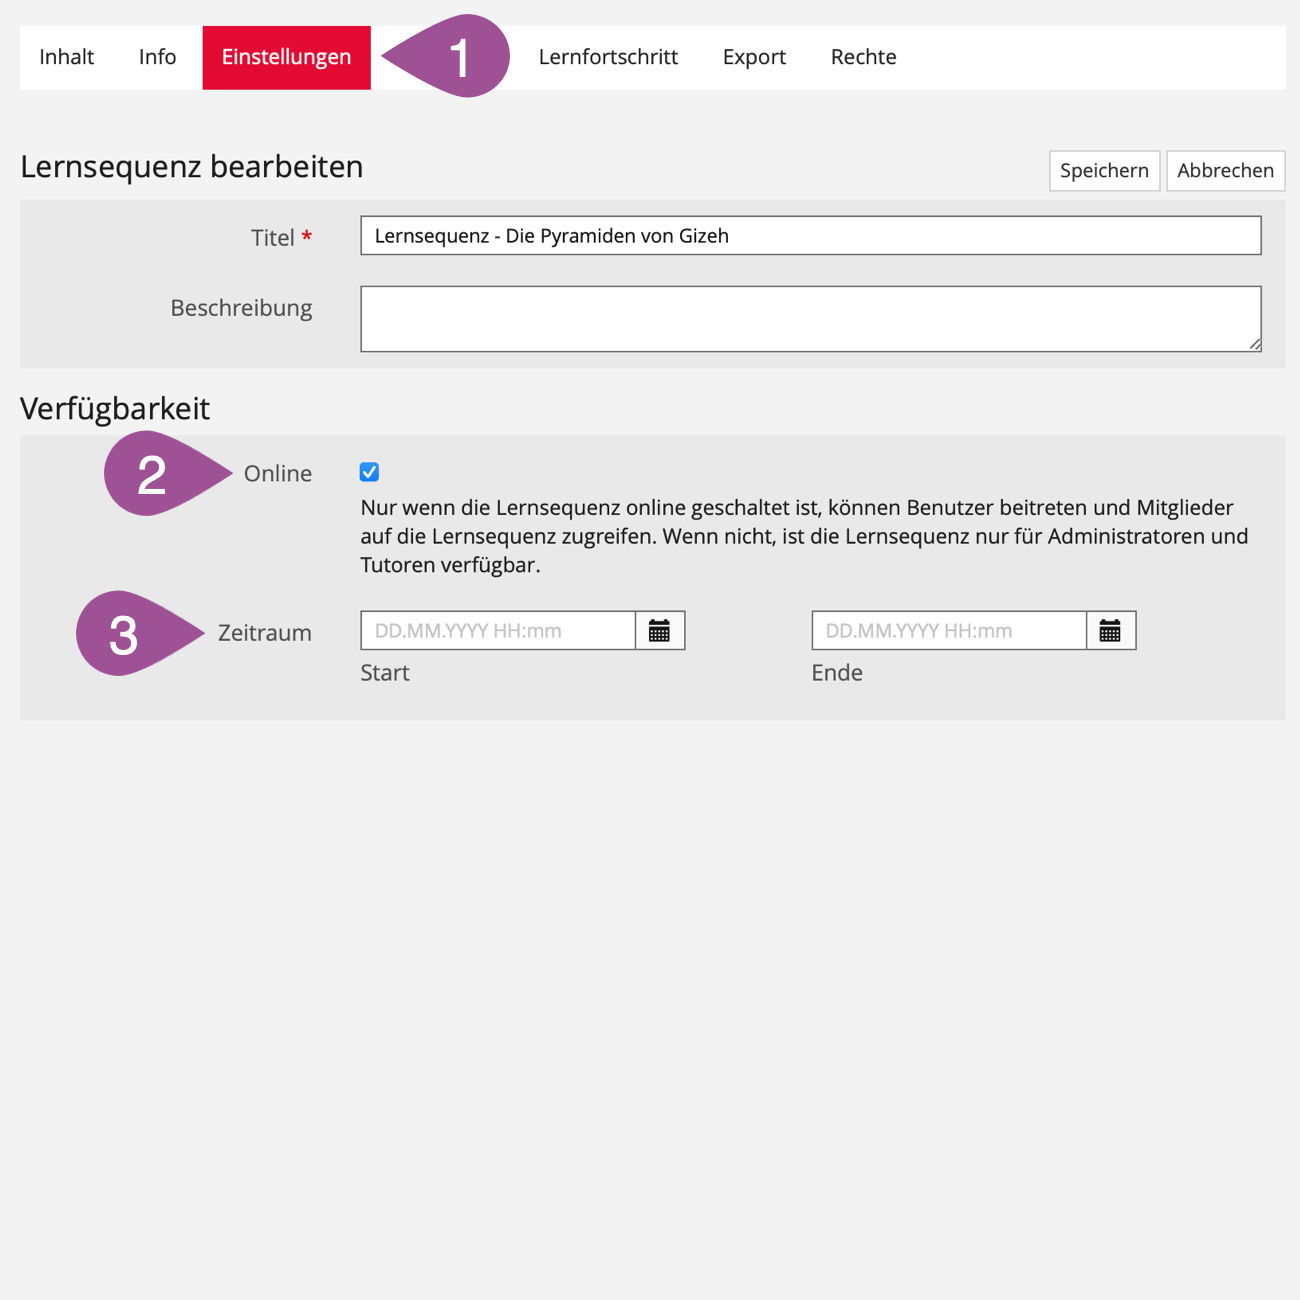
2. Adjust settings
| Go to the «Settings» tab. |
| Set the learning sequence «online» at the time you want students to have access to it. |
| You can set a limited «Availability Period». Outside of this period, the learning sequence is not visible to users, whether online or offline. |
 | Create an «Intro Page». It will be presented before launching the first object within the learning sequence (see 5. Student perspective). When inserting images, please follow the recommended image sizes (see Notes on image sizes on ILIAS). |
 | Create an «Exit Page». It will be presented after the last object within the learning sequence has been completed (see 5. Student perspective). When inserting images, please follow the recommended image sizes (see Notes on image sizes on ILIAS). |
 | You can upload your own icon for the learning sequence. When inserting images, please follow the recommended image sizes (see Notes on image sizes on ILIAS). |
 | Under «Tile Image» you can upload a tile image for the learning sequence (see also Manual: Tile design). When inserting images, please follow the recommended image sizes. Notes on image sizes on ILIAS |
 | «Save» your settings. |


.
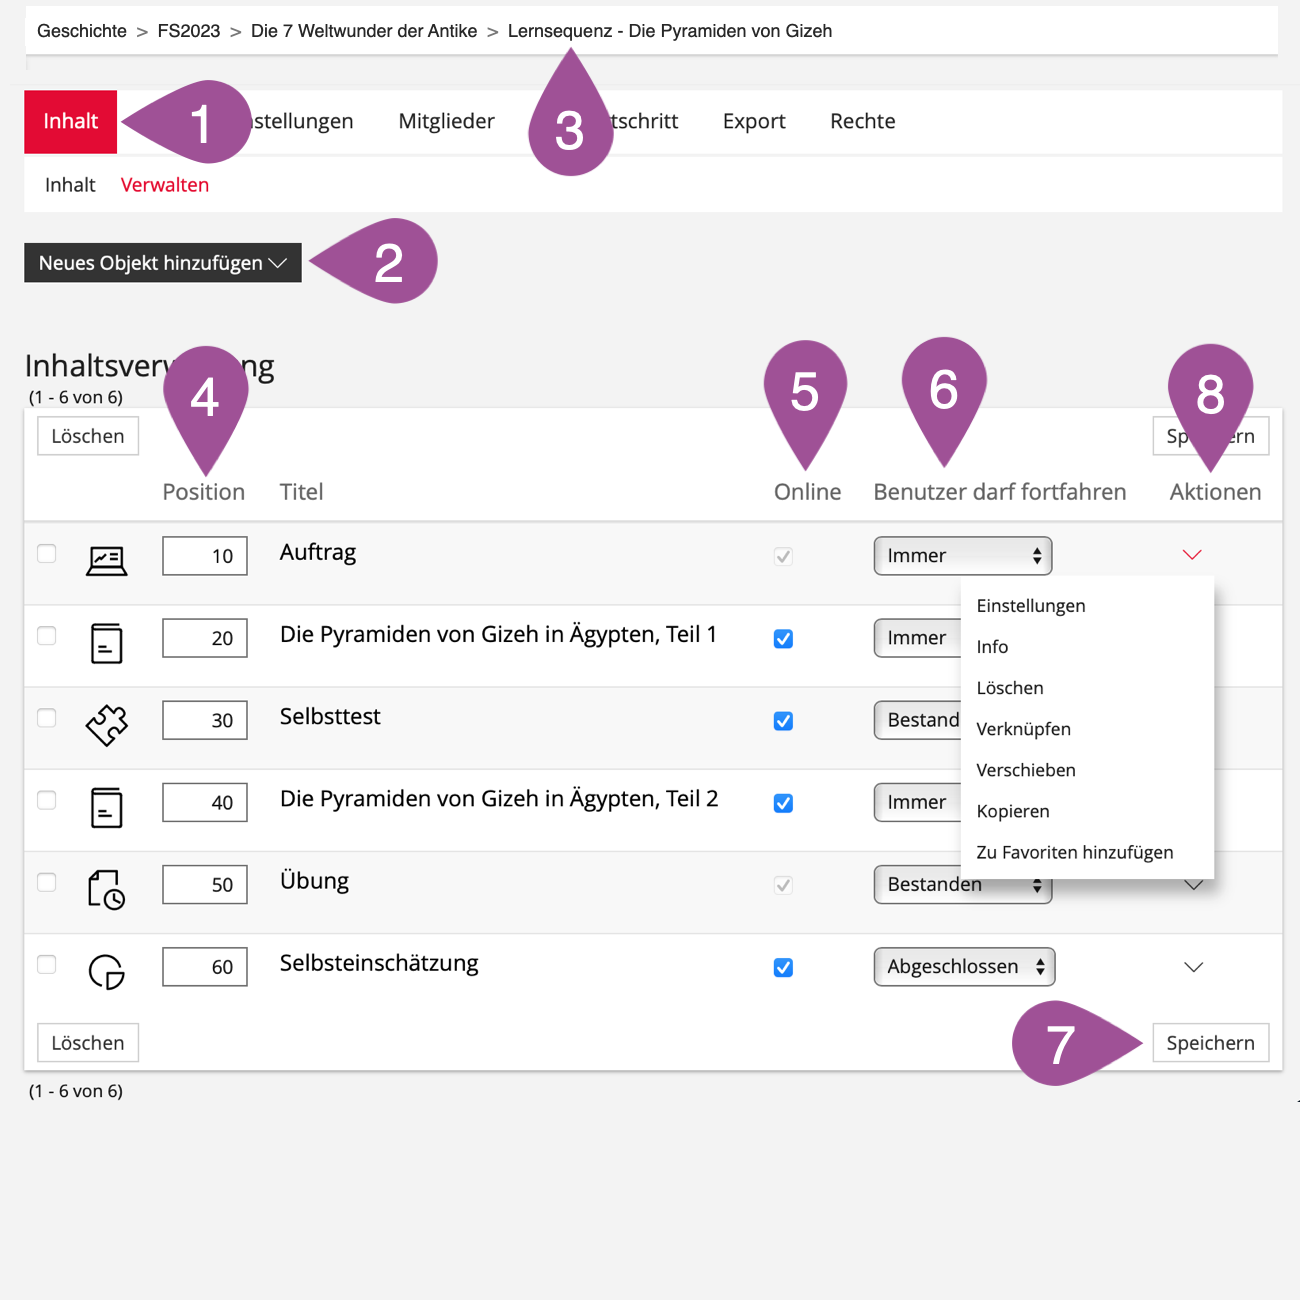
3. Add content
| Go to the «Content» tab. |
| In the «Manage» sub-tab, click on «Add New Item» and select the item you want to start setting it up. Detailed manuals for each item can be found in the ILIAS support section under «Manuals». |
| After creating an object, you can navigate back to the learning sequence via the breadcrumb to add more objects. |
| In the «Position» column, you can define the order of the objects. |
| Ensure all objects are set to «Online»; otherwise, they will not be available in the learning sequence and may prevent students from continuing their work. Objects with grayed-out boxes do not distinguish between online/offline and are always available. |
| In the «User may proceed» column, you can define the conditions under which students can proceed to the next object (precondition).
|
| «Save» your settings. |
| Using the action menus of the individual items, you can edit, copy and delete them. |
.
4. View degree of completion
There are two ways to see which steps of the learning sequence individual students have and have not worked on: Participant Management and the Learning progress.
.
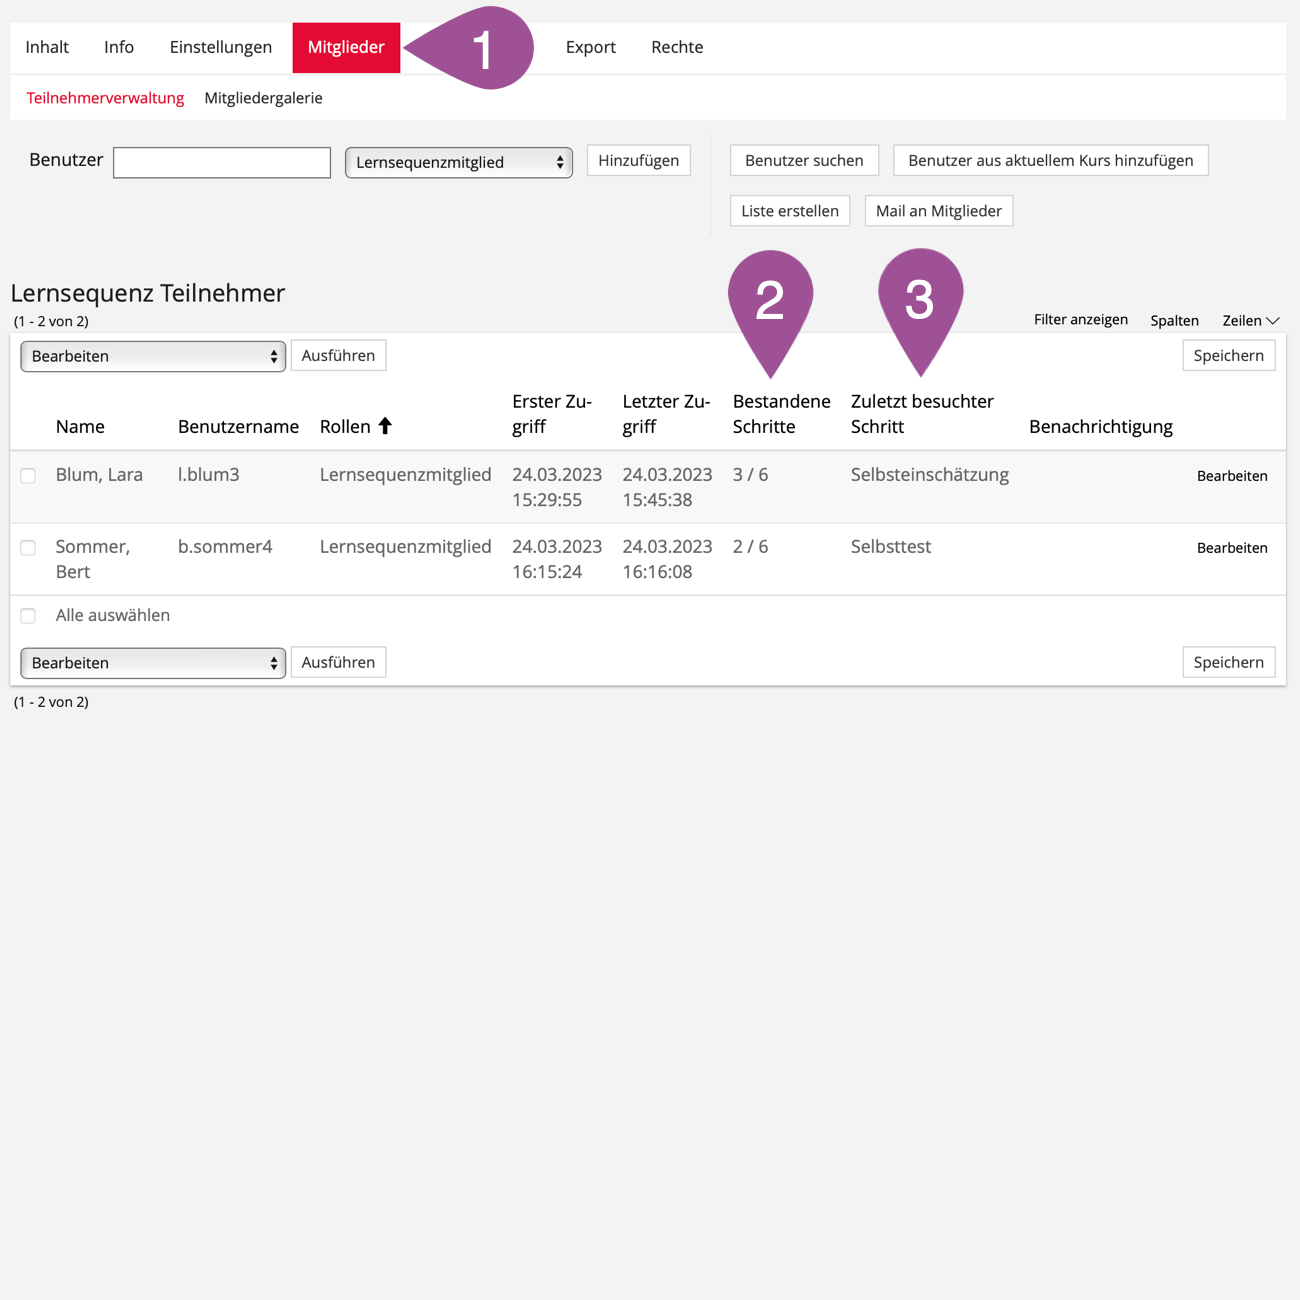
Participant management
Participant management is available in every learning sequence and does not have to be explicitly activated.
| Go to the «Members» tab. |
| In the «Passed Steps» column, you can see how many steps each person has already passed. |
| In the «Last visited Step» column, you can see which step the person last worked on or is still working on. |
.
Learning progress
The learning progress is initially deactivated in the learning sequence and must be activated to be used.
| Go to the «Learning Progress» tab. |
| Go to the «Settings» sub-tab. |
| Select «Status is Determined by a Collection of Items». |
| «Save» your settings. |
| Select the items to be included in the learning progress. |
| Click «Execute». |
| In the «Users» sub-tab, you can see the access details, total completion time, as well as the overall status of each student. |
| In the «Matrix View» sub-tab, you can see for each student the processing status of learning progress-relevant materials and their overall completion status. |
 | In the «Summary» sub-tab, you can see the number of accesses, the average working times, the obtained percentages per user, and the status distribution of each material relevant to the learning progress. |


.
5. Student perspective
| When students first launch the learning sequence, they will see the «Intro Page».
| ||||||
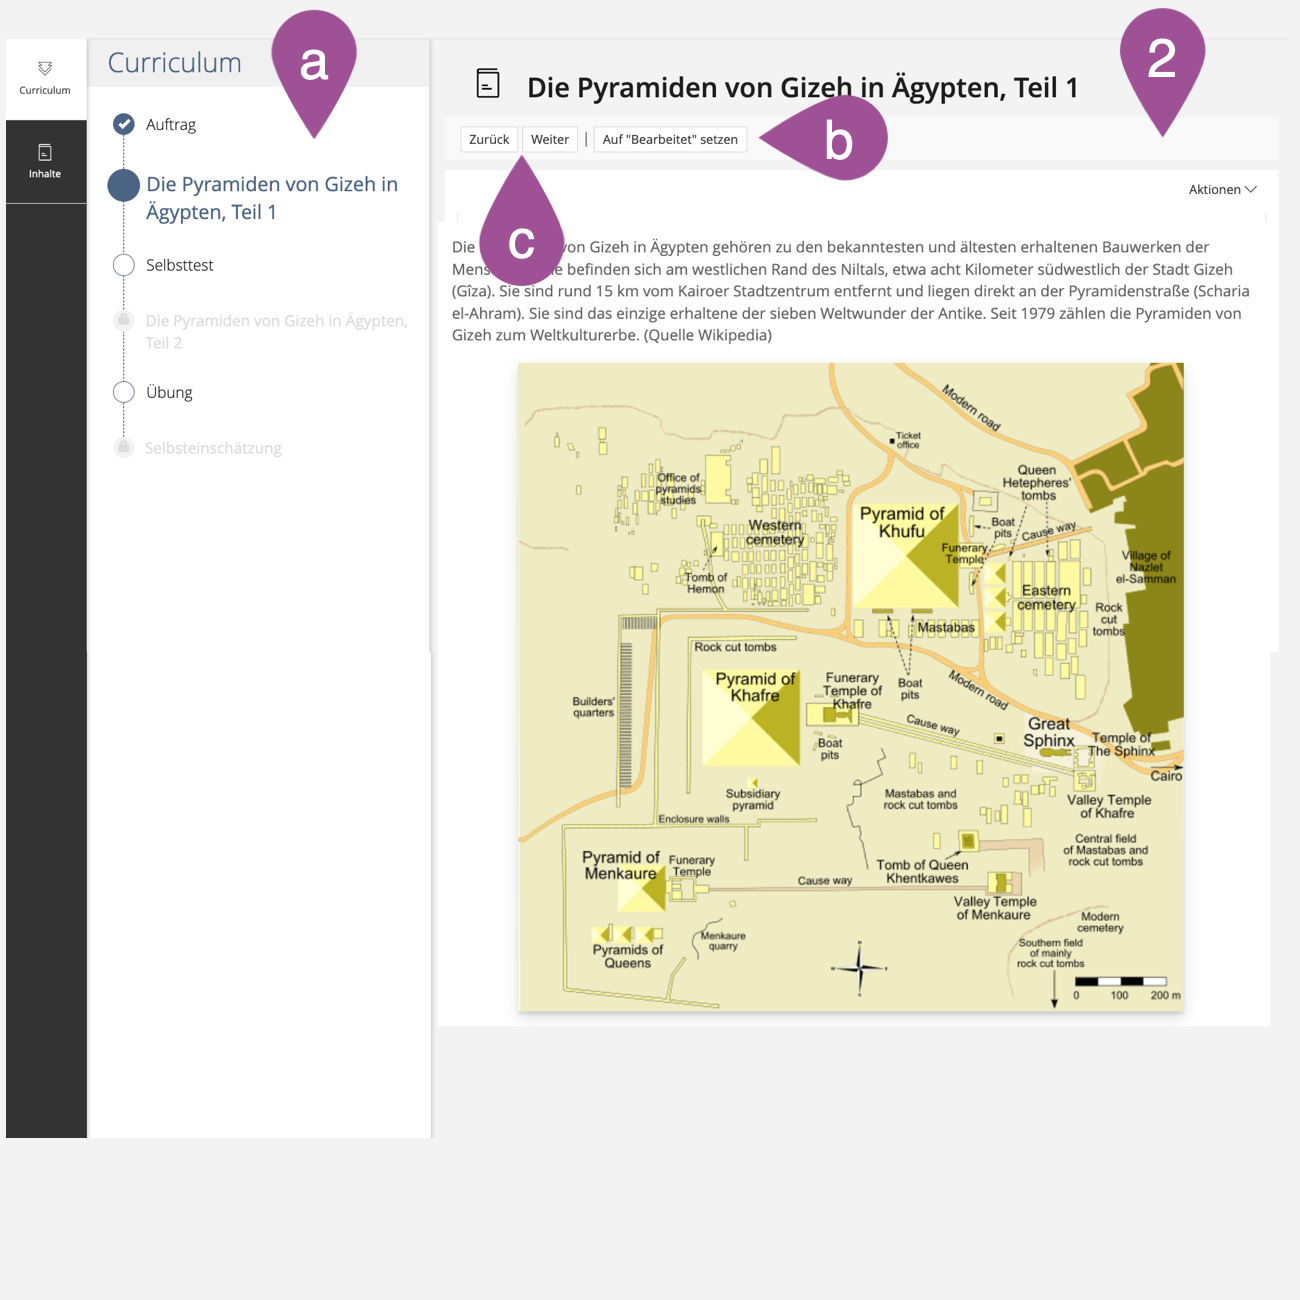
| After the learning sequence has been started, it opens in kiosk mode, in which all other ILIAS navigation elements are hidden.
| ||||||


.
6. Application scenarios
The following pages will give you an idea of how a learning sequence can be used:
Zuletzt geändert: 5. Sep 2025, 09:02, Thiel, Anja [a.thiel5]