


ILIAS Support (English)
Reiter
Manual: Folder
Deutsch | English
Manual: Folder
If you create a folder in your course, you can place further folders, objects and tools in this folder and make them available to your students. You can thus structure and provide your content in a folder structure.
.
1. Create a folder
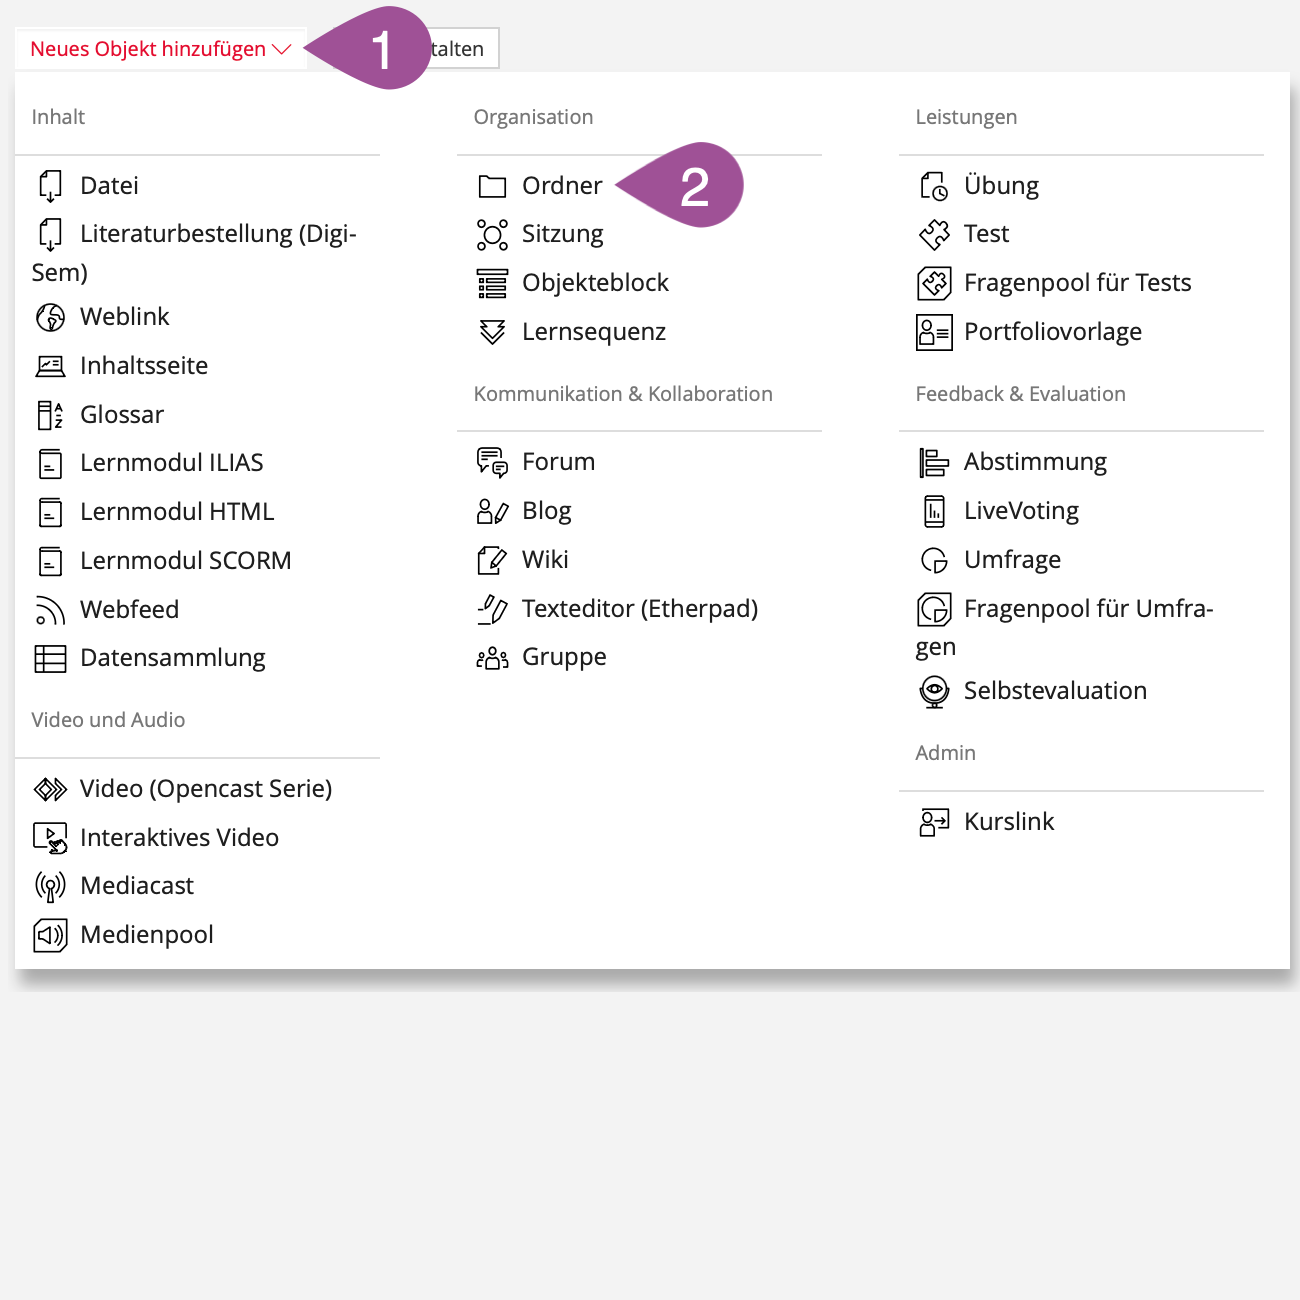
 | Click on «Add New Item» |
 | Select «Folder». |
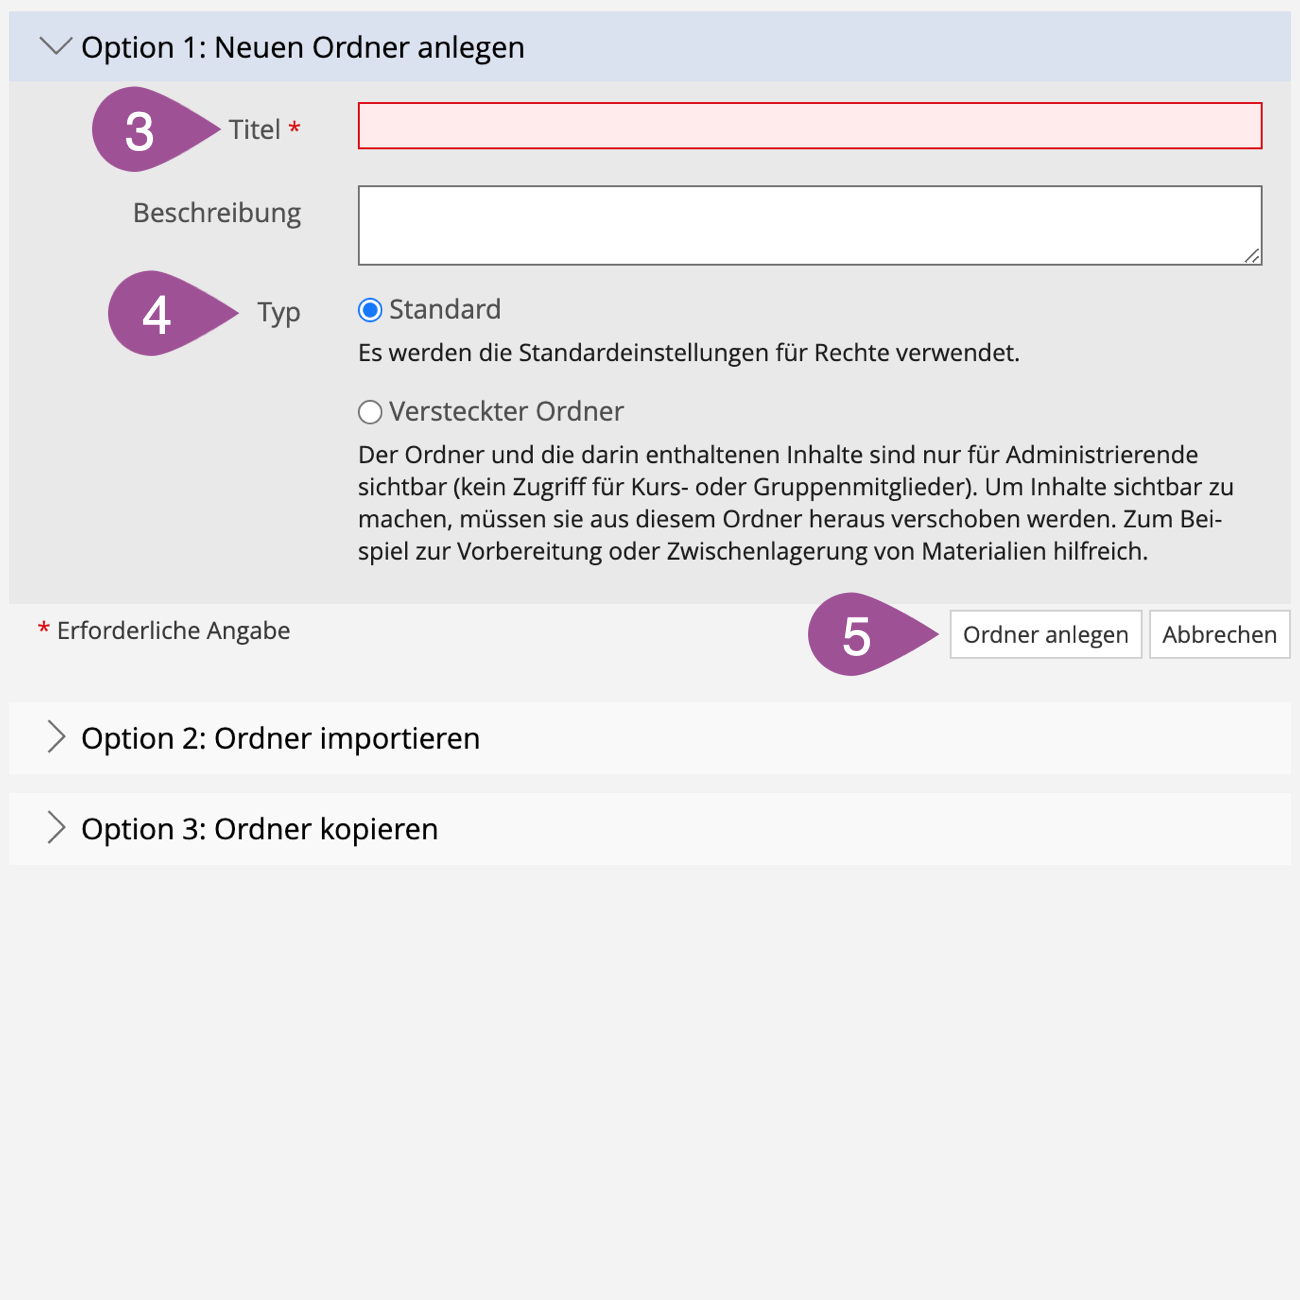
 | Give the folder a «Title». |
 | Select a folder type.
You can use a hidden folder to prepare documents and ILIAS items, for example. As soon as you want them to be accessible, you can move them into the course. The folder type can be changed later in the folder settings (see 2. Adjust settings & availability). |
 | Click on «Add Folder». |

.
2. Adjust settings & availability
.
Configure settings
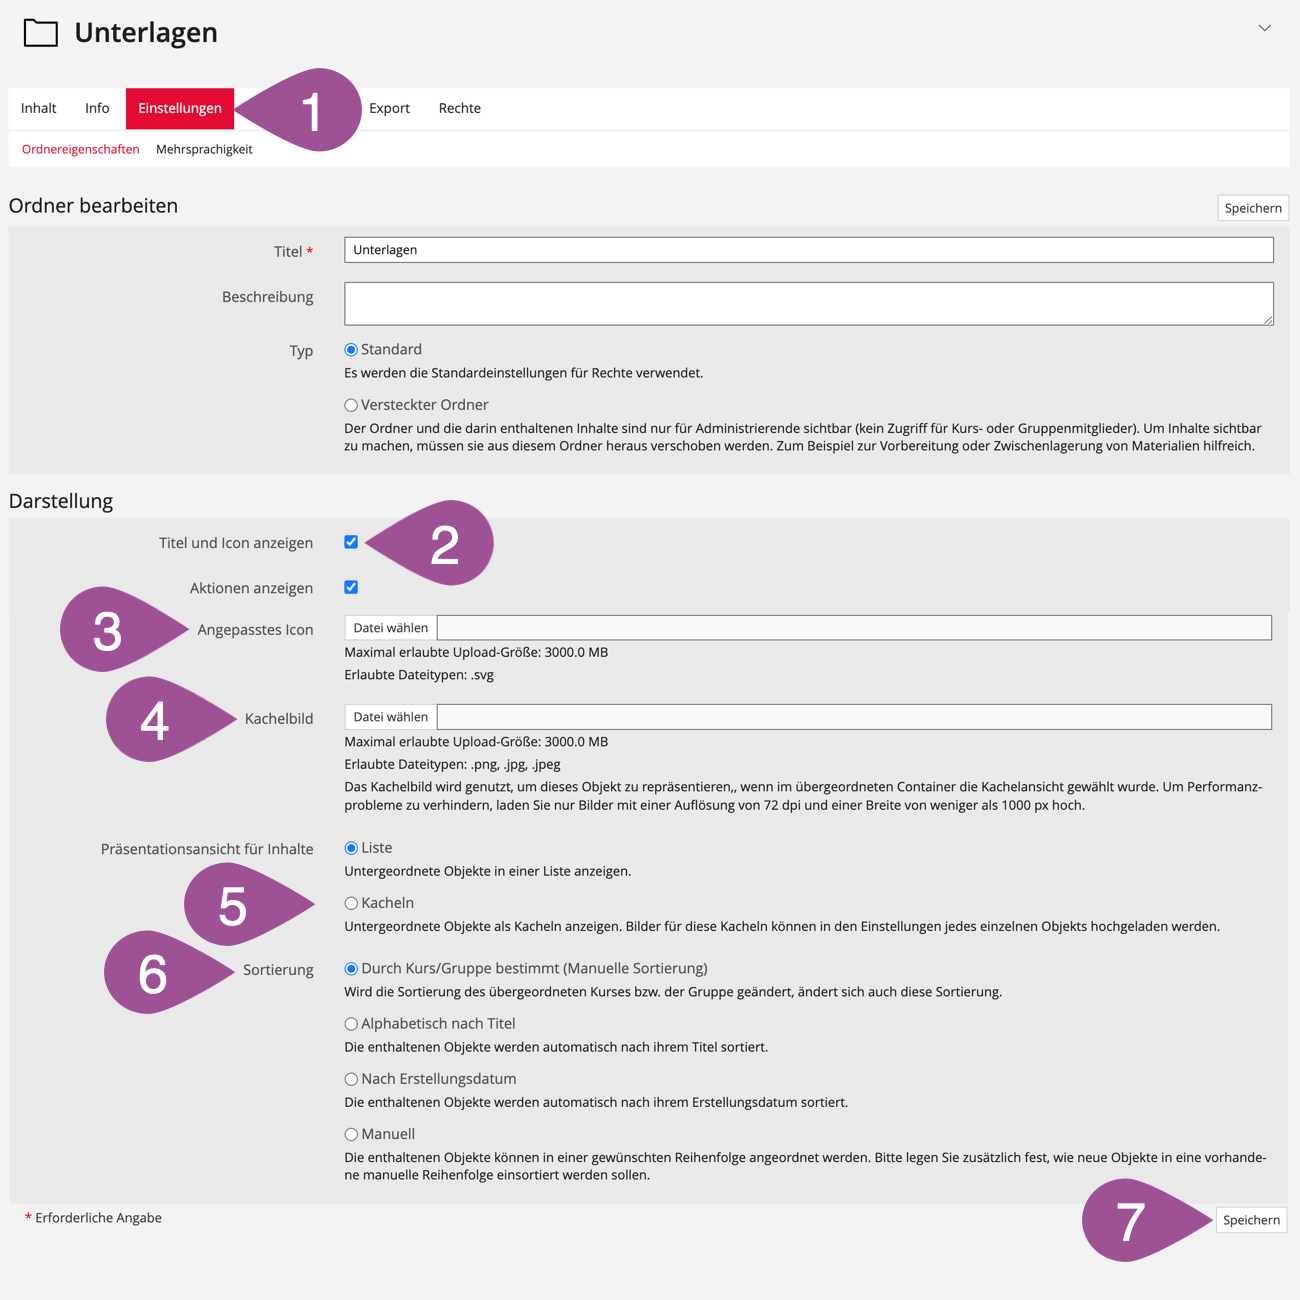
| Go to the «Settings» tab. |
| Choose whether the folder's title and icon should be displayed at the top. |
| You can upload your own icon for the folder. When inserting images, please follow the recommended image sizes (see Notes on image sizes on ILIAS). |
| Under «Tile Image» you can upload a tile image for the folder (see point 5 and Manual: Tile design). When inserting images, please follow the recommended image sizes. Notes on image sizes on ILIAS |
| Choose the «Tile» item presentation if you want the folder's content displayed as tiles instead of a list (see also Manual: Tile design). For many items, you can upload your own tile image (see point 4). |
 | Choose how the contents of the folder should be sorted. By default, the sorting of the folder contents is based on the setting of the parent container (e.g., course, group). You can override this default sorting mode with a separate setting in the folder. |
 | «Save» your settings. |
.
Restrict availability
You can set the period in which the folder can be accessed. Outside this period, the folder cannot be accessed.
 | Go to the location on ILIAS where you have stored the folder. |
 | Open the folder's actions menu. |
 | Select «Availability». |
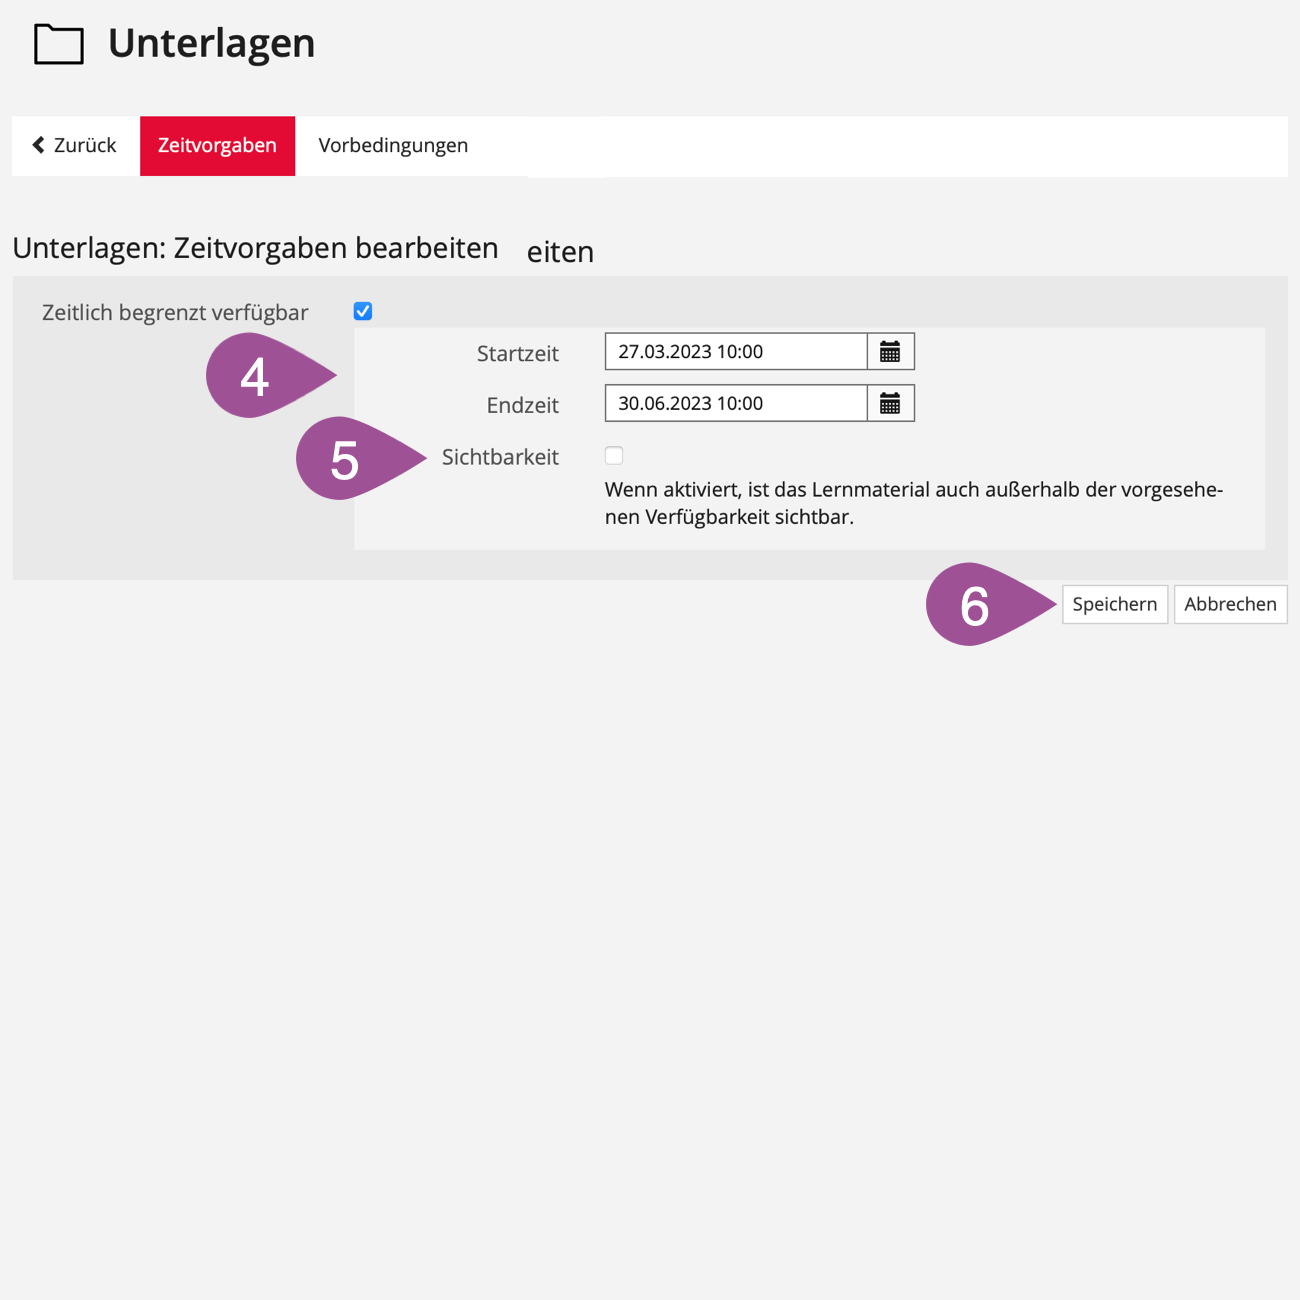
| Activate the «Temporarily available» option and enter the period during which you want the folder to be accessible. |
| If checked, the folder is visible outside the designated availability but cannot be accessed. |
| «Save» your settings. |

.
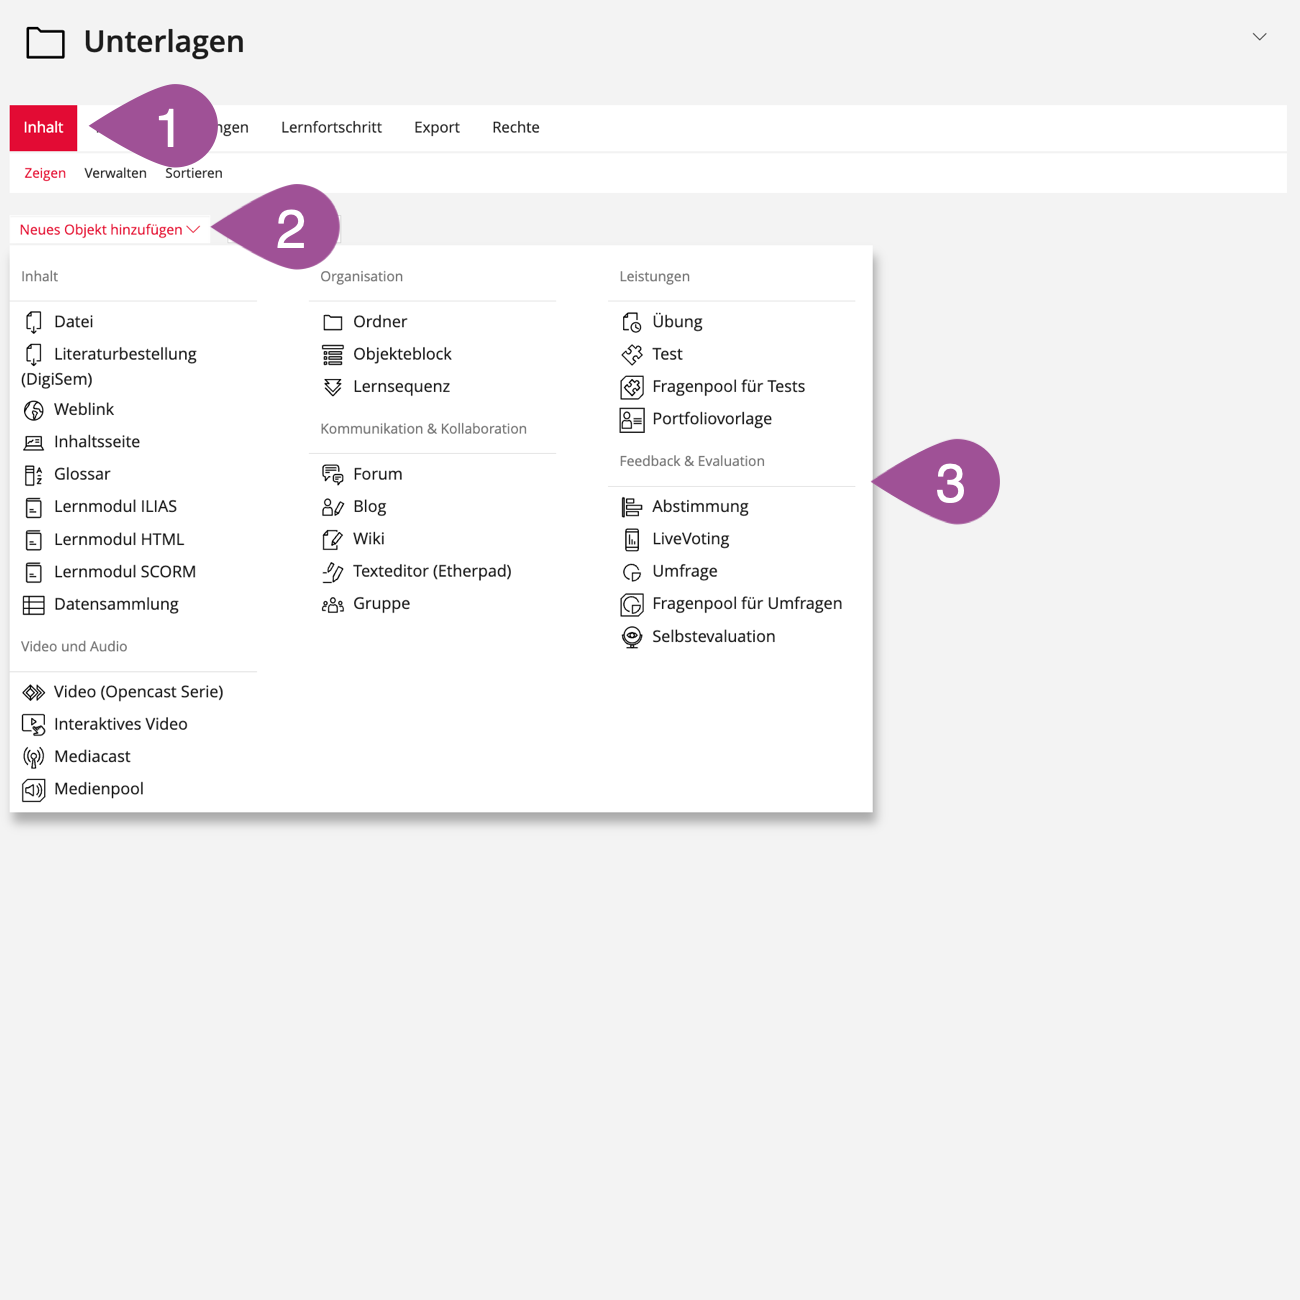
3. Add content
| Go to the «Content» tab. |
| Click on «Add New Item». |
| Click on the item you want to start setting it up. Detailed manuals for each item can be found in the ILIAS support section under «Manuals». Manuals |
.
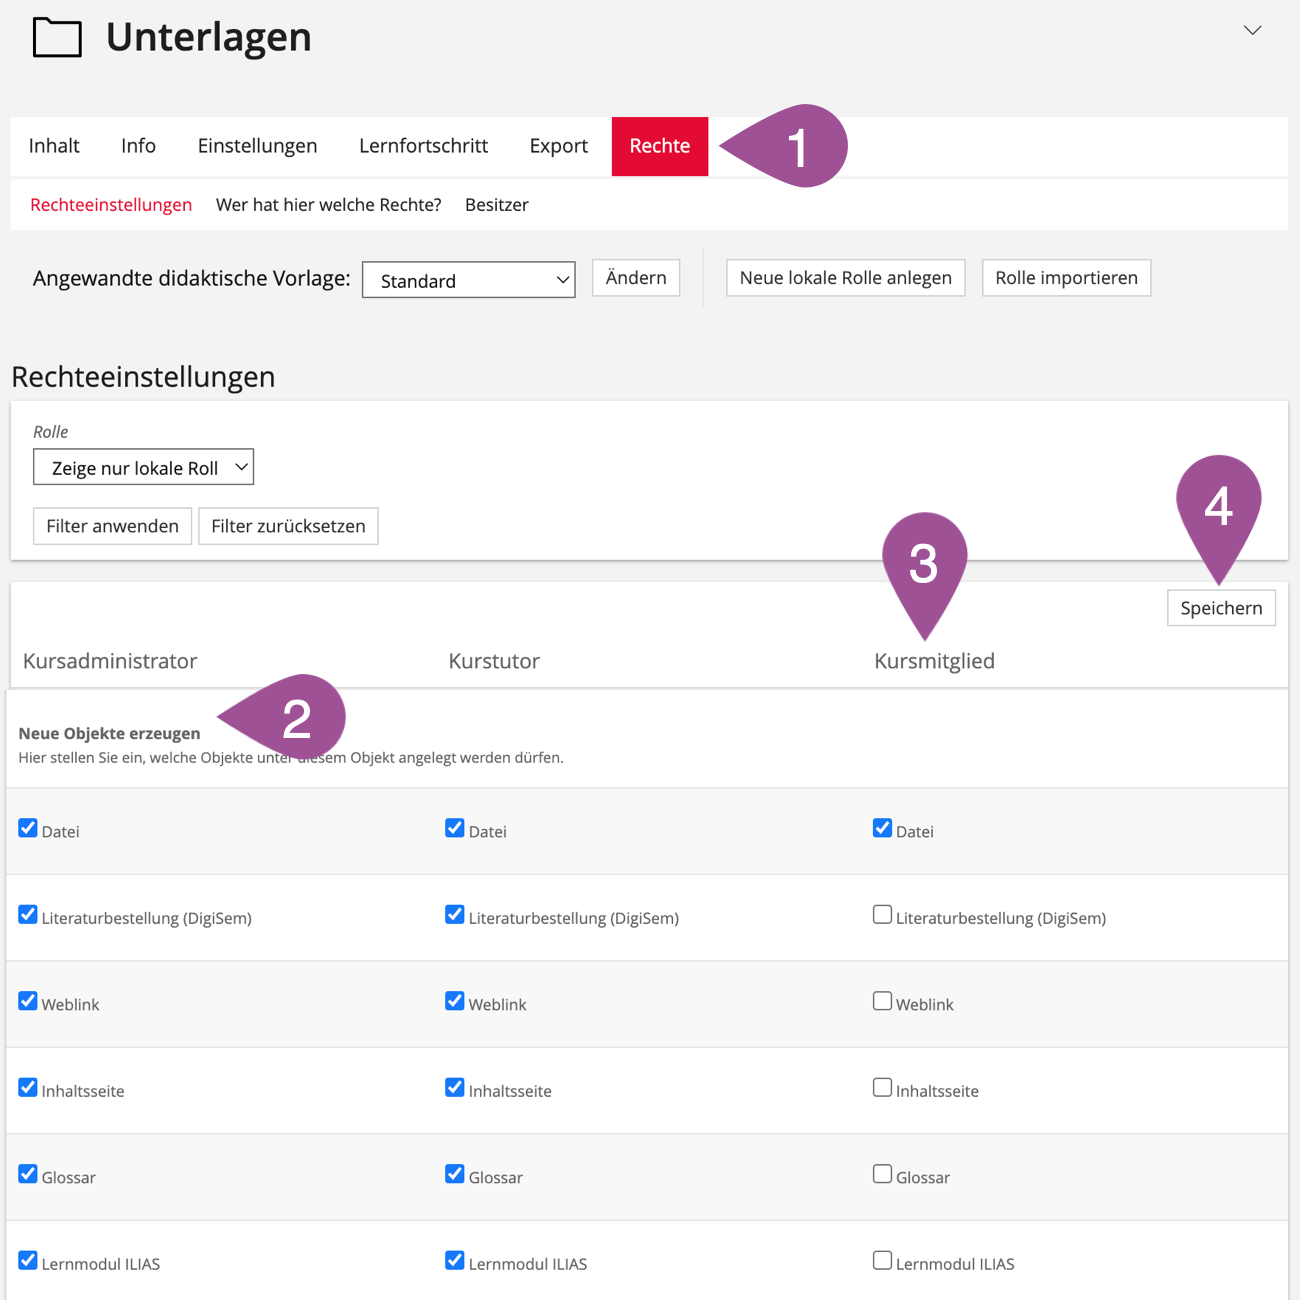
4. Assign permissions
Generally, you can extend the permissions within folders for your course members and allow them to create and edit new items in this and only this folder.
| Go to the «Permissions» tab. |
| Scroll down to the «Create new Objects» section. |
| Activate the objects that members (right column) are allowed to create within the folder. |
| «Save» your settings. |
.
5. Application scenarios
The following pages will give you an idea of how a folder can be used:
Zuletzt geändert: 5. Sep 2025, 08:47, Thiel, Anja [a.thiel5]