


ILIAS Support (English)
Reiter
Manual: Blog
Landing page > Manuals > Blog
Deutsch | English
Manual: Blog
1. Create a blog
2. Switch between preview mode & edit mode
3. Adjust settings & availability
3.1 Configure settings
3.2 Restrict availability
4. Assign contributors & permissions
4.1 Add contributors
4.2 Adjust permissions
5.1 Add a post
5.2 Define keywords for a post
5.3 Edit a post
5.4 Publish a post
5.5 Delete a post
6.1 Email notifications via ILIAS
6.2 Notifications via external RSS feed
.
1. Create a blog
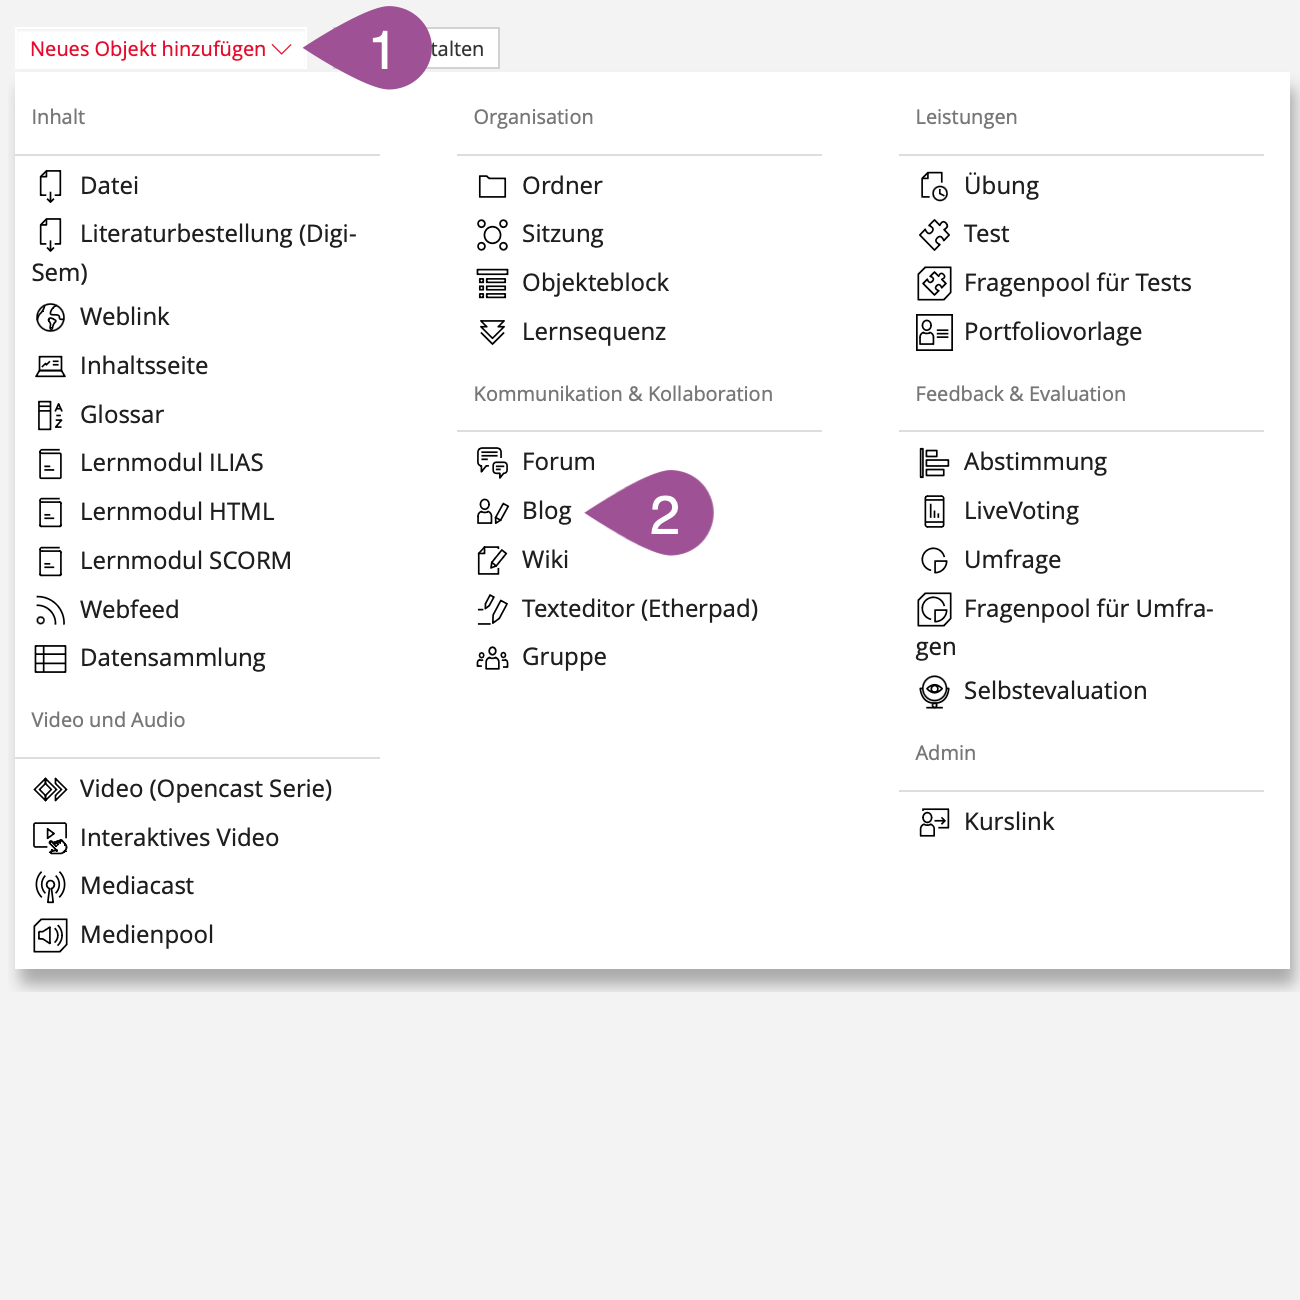
 | Click on «Add New Item». |
 | Select «Blog». |
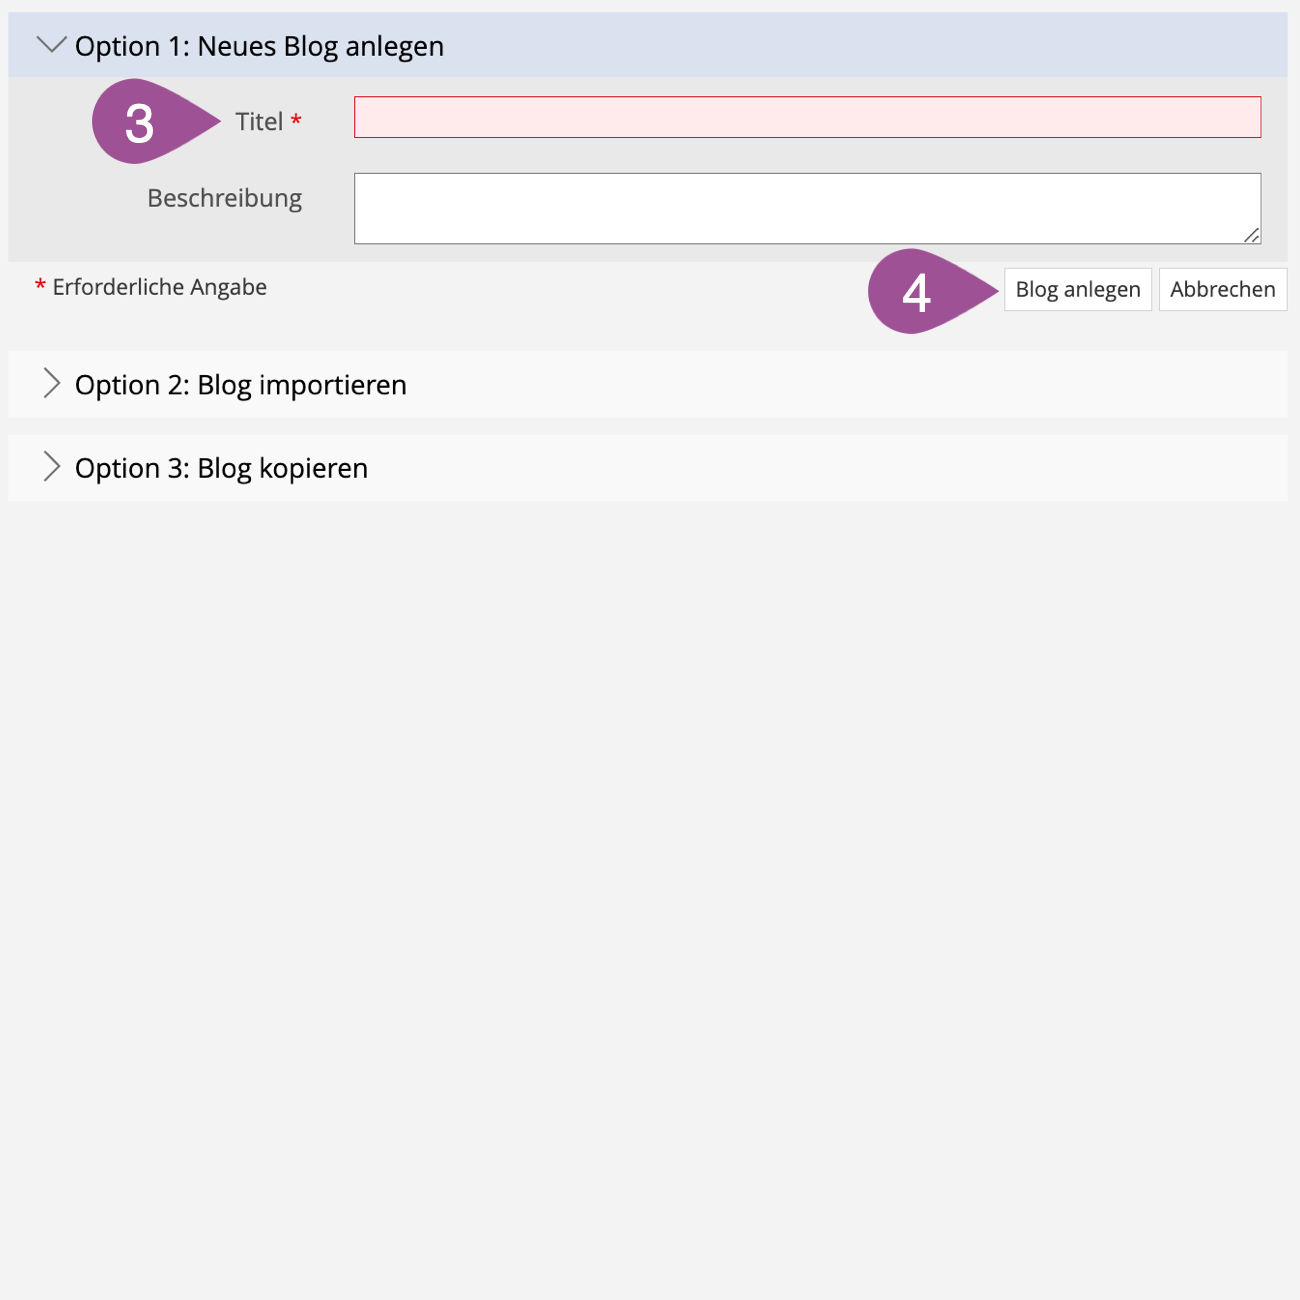
 | Give the blog a «Title». |
 | Click on «Create Blog». |

.
2. Switch between preview mode & edit mode
When you call up a blog, e.g., from a course room or via a link, you will be directed to the preview mode where the existing blog posts and the navigation and filter functions are displayed.
To edit settings, contributors, and permissions, and to create and manage posts, you have to switch to edit mode. Follow the steps below to do so:
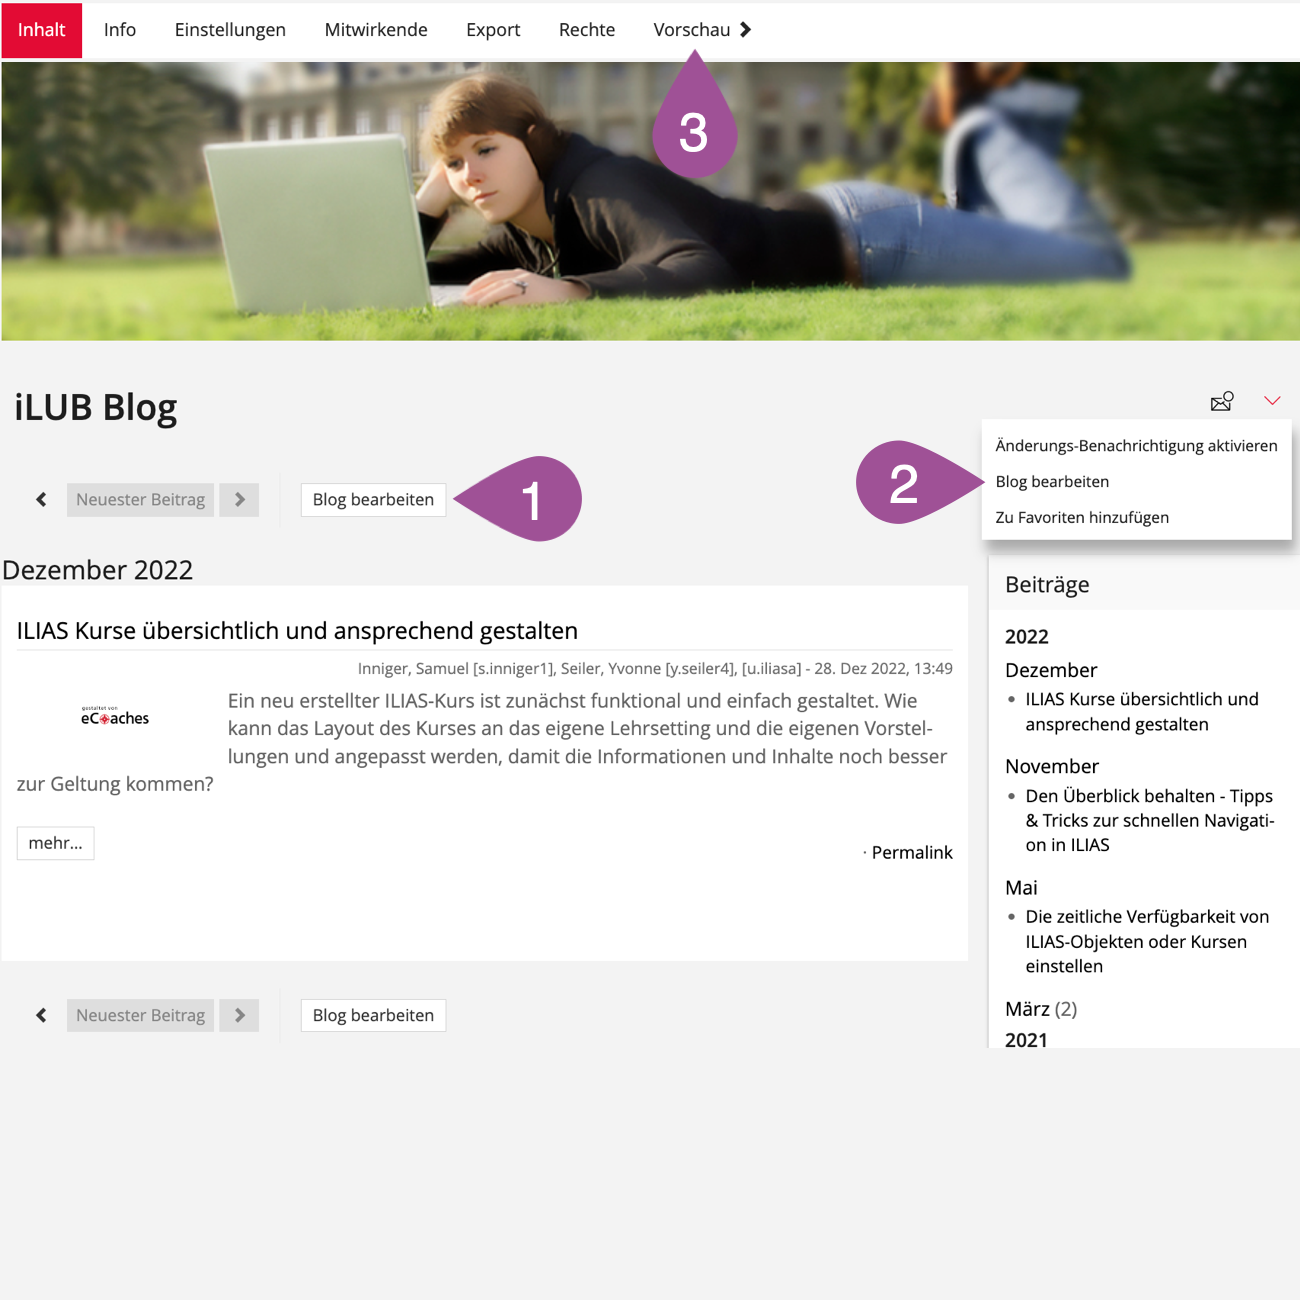
| If there are existing blog posts, click «Edit Blog». |
| You will not see the «Edit Blog» button if there are no existing blog posts yet. Instead, open the actions menu and select «Edit Blog». |
| To return to the preview mode, click the «Preview» tab. |
.
3. Adjust settings & availability
.
Configure settings
To get to the settings of a blog, you have to be in edit mode (see 2. Switch between preview mode & edit mode).
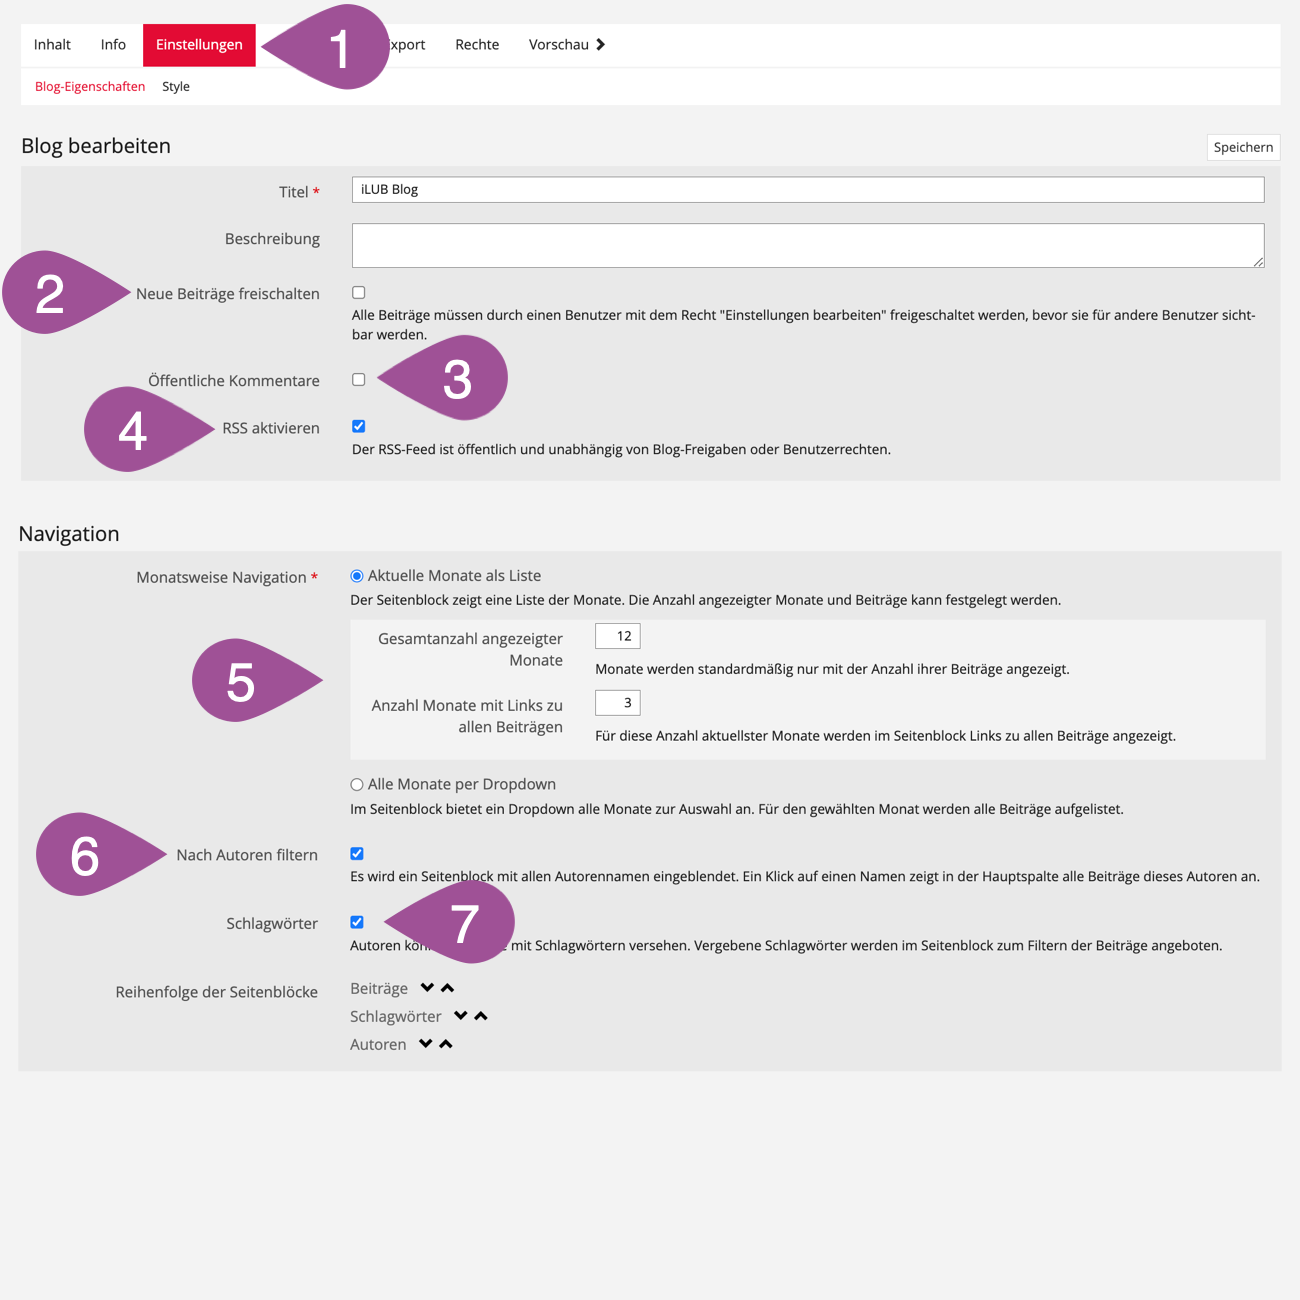
| In edit mode, go to the «Settings» tab. |
| If checked, posts created by users will not be visible to others until they are approved. (see 5.4 Publish a post). |
| If checked, readers can comment on posts. |
 | If checked, readers can receive new posts via an RSS feed. |
 | Choose whether the navigation should be done via a list or drop-down menu. For lists, you can also specify how many months should be displayed and how many of the most recent months' links to the posts should be listed. |
 | If checked, readers can filter posts by contributing authors. |
 | If checked, authors can assign keywords to their posts, which will be displayed to readers for filtering. With the help of keywords, posts can be categorized by theme, and connections to similar posts are immediately recognizable. |
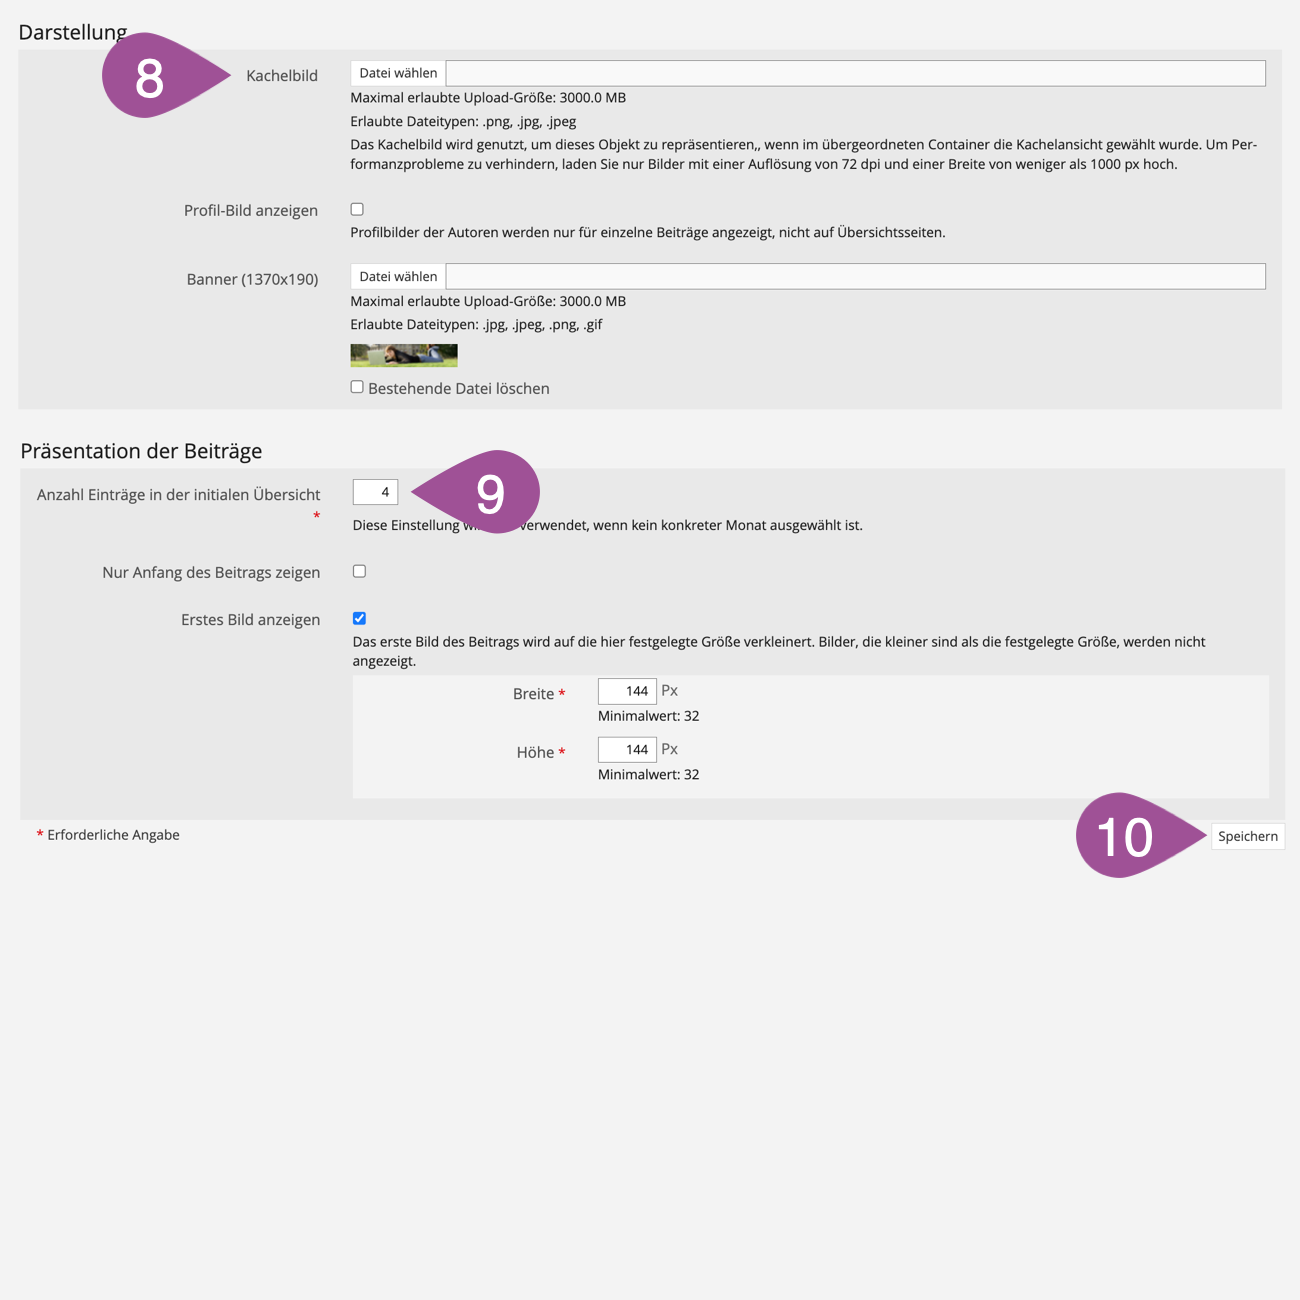
 | Under «Tile Image» you can upload a tile image for the blog (see also Manual: Tile design). When inserting images, please follow the recommended image sizes. Notes on image sizes on ILIAS |
 | Select the number of posts displayed by default when opening the blog if no specific month is selected. |
 | «Save» your settings. |
.
Restrict availability
You can set the period in which the blog can be accessed. Outside this period, the blog cannot be accessed.
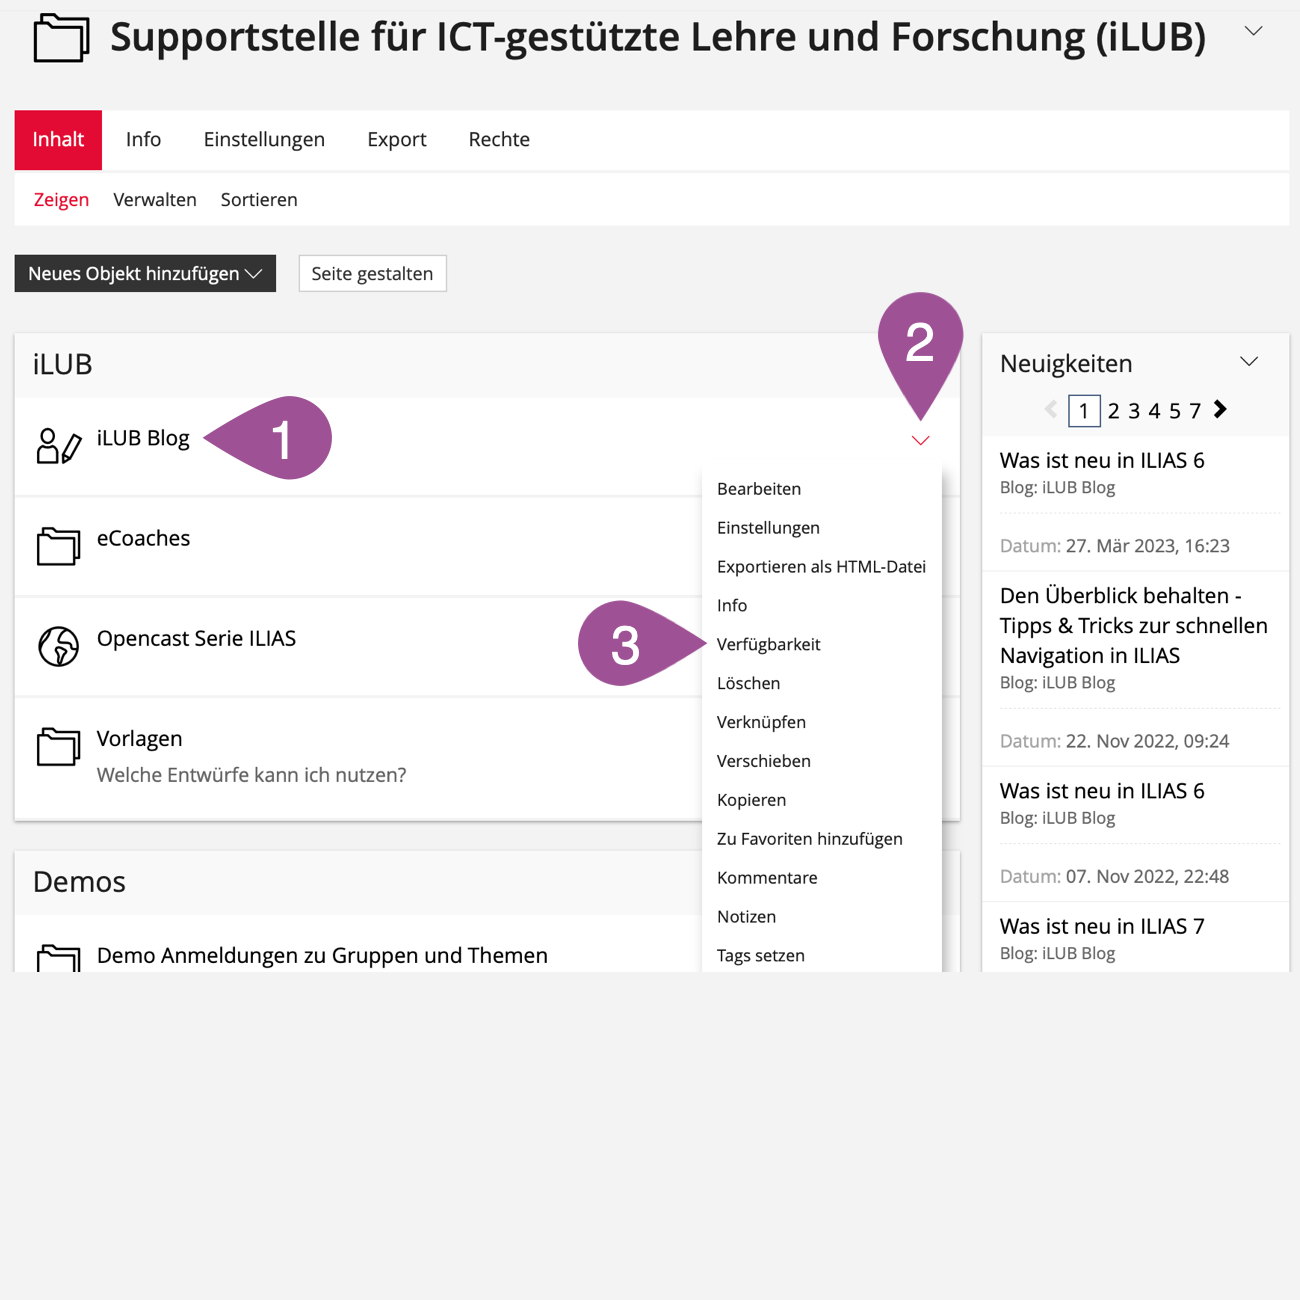
| Go to the location on ILIAS where you have stored the blog. |
| Open the blog's actions menu. |
| Select «Availability». |
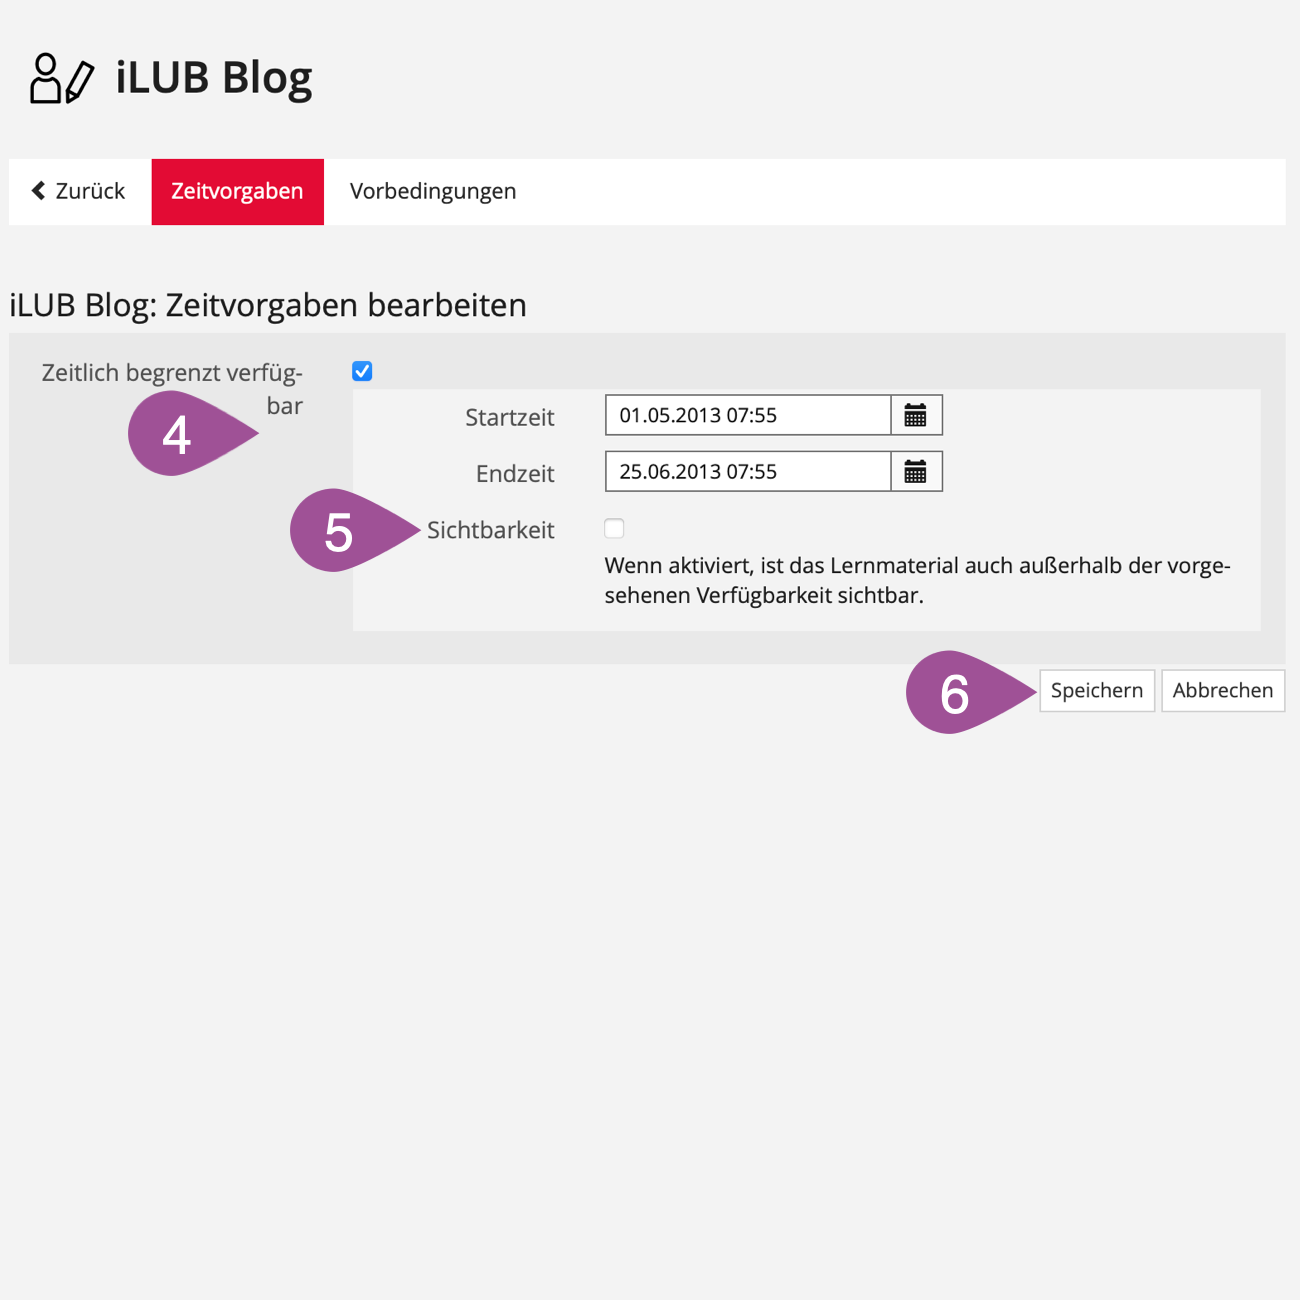
| Activate the «Temporarily available» option and enter the period during which you want the blog to be accessible. |
| If checked, the blog is visible outside the designated availability but cannot be accessed. |
| «Save» your settings. |
.
4. Assign contributors & permissions
If the blog is a collaborative project that you want several people to contribute to, you have to add them as contributors and give them appropriate permissions.
.
Add contributors
For contributors, a distinction is made between the roles of blog author and blog editor, each with specific permissions. You can choose which person you want to give which of these roles. If you want all students in a course to contribute to a blog, it's easier to adjust the permissions for all course members instead of assigning roles (see 4.2 Adjust permissions).
To define individuals as contributors, you have to be in edit mode (see 2. Switch between preview mode & edit mode). Follow the steps below:
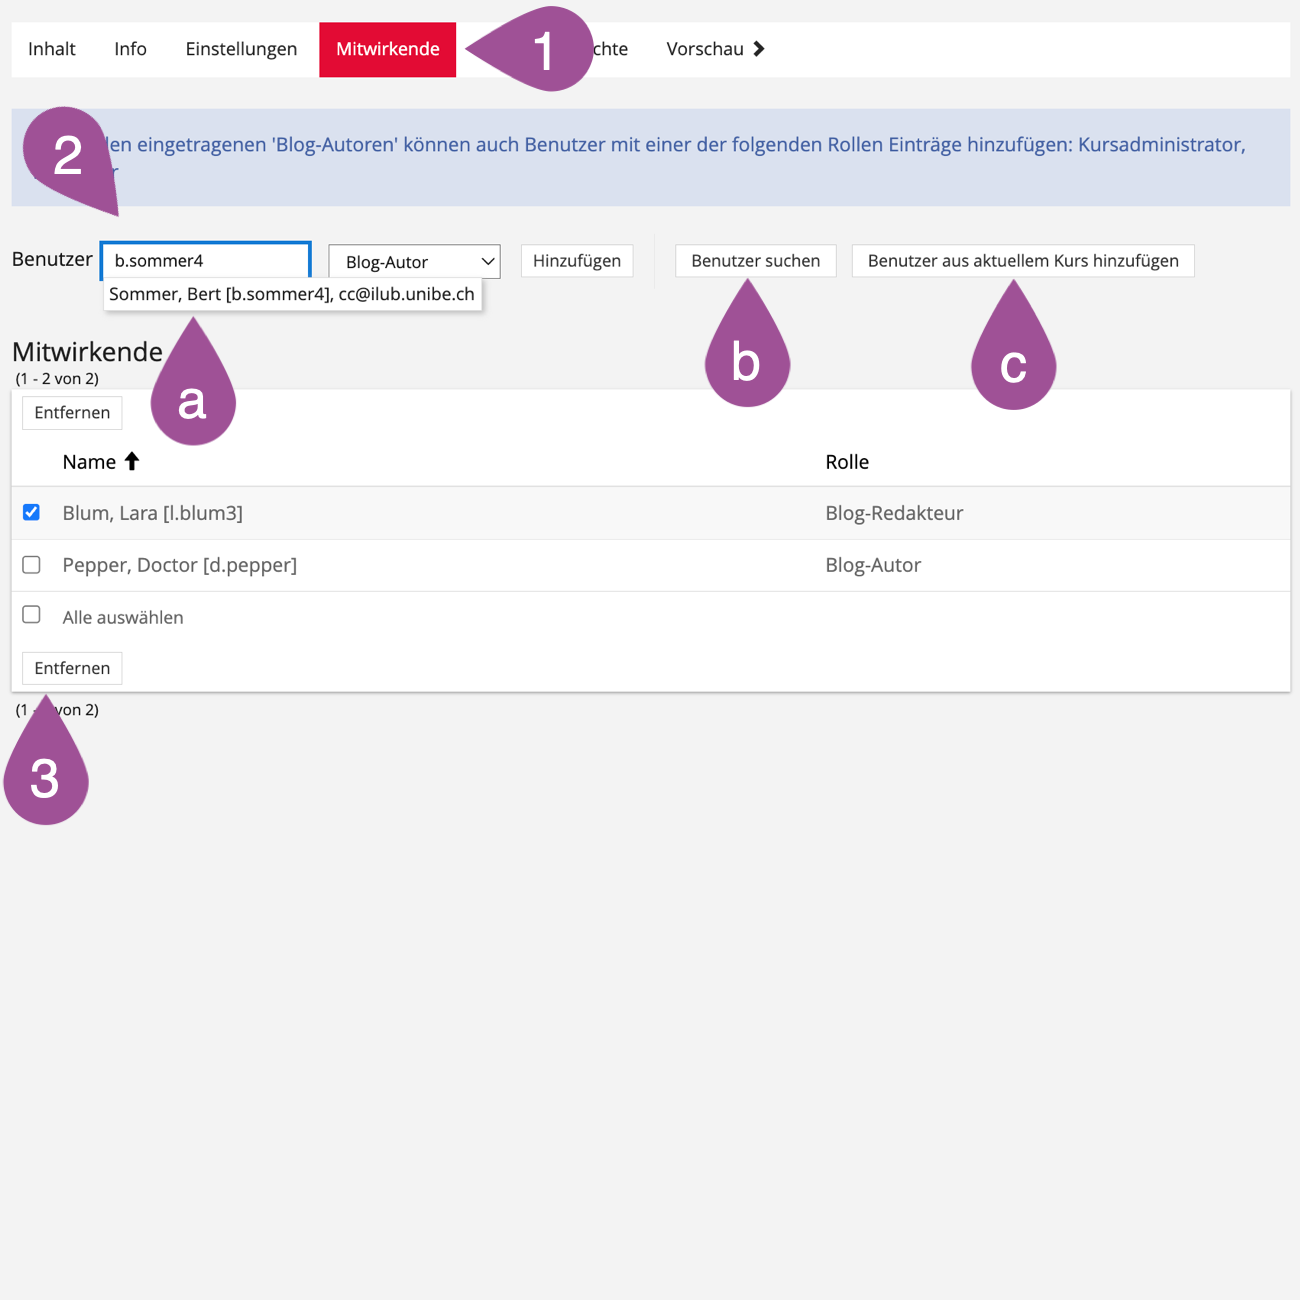
| In edit mode, go to the «Blog-Contributors» tab. | ||||||
| Search for the person you want to add as a contributor.
| ||||||
| To remove a person from the contributors, select the person and click «Remove». |


.
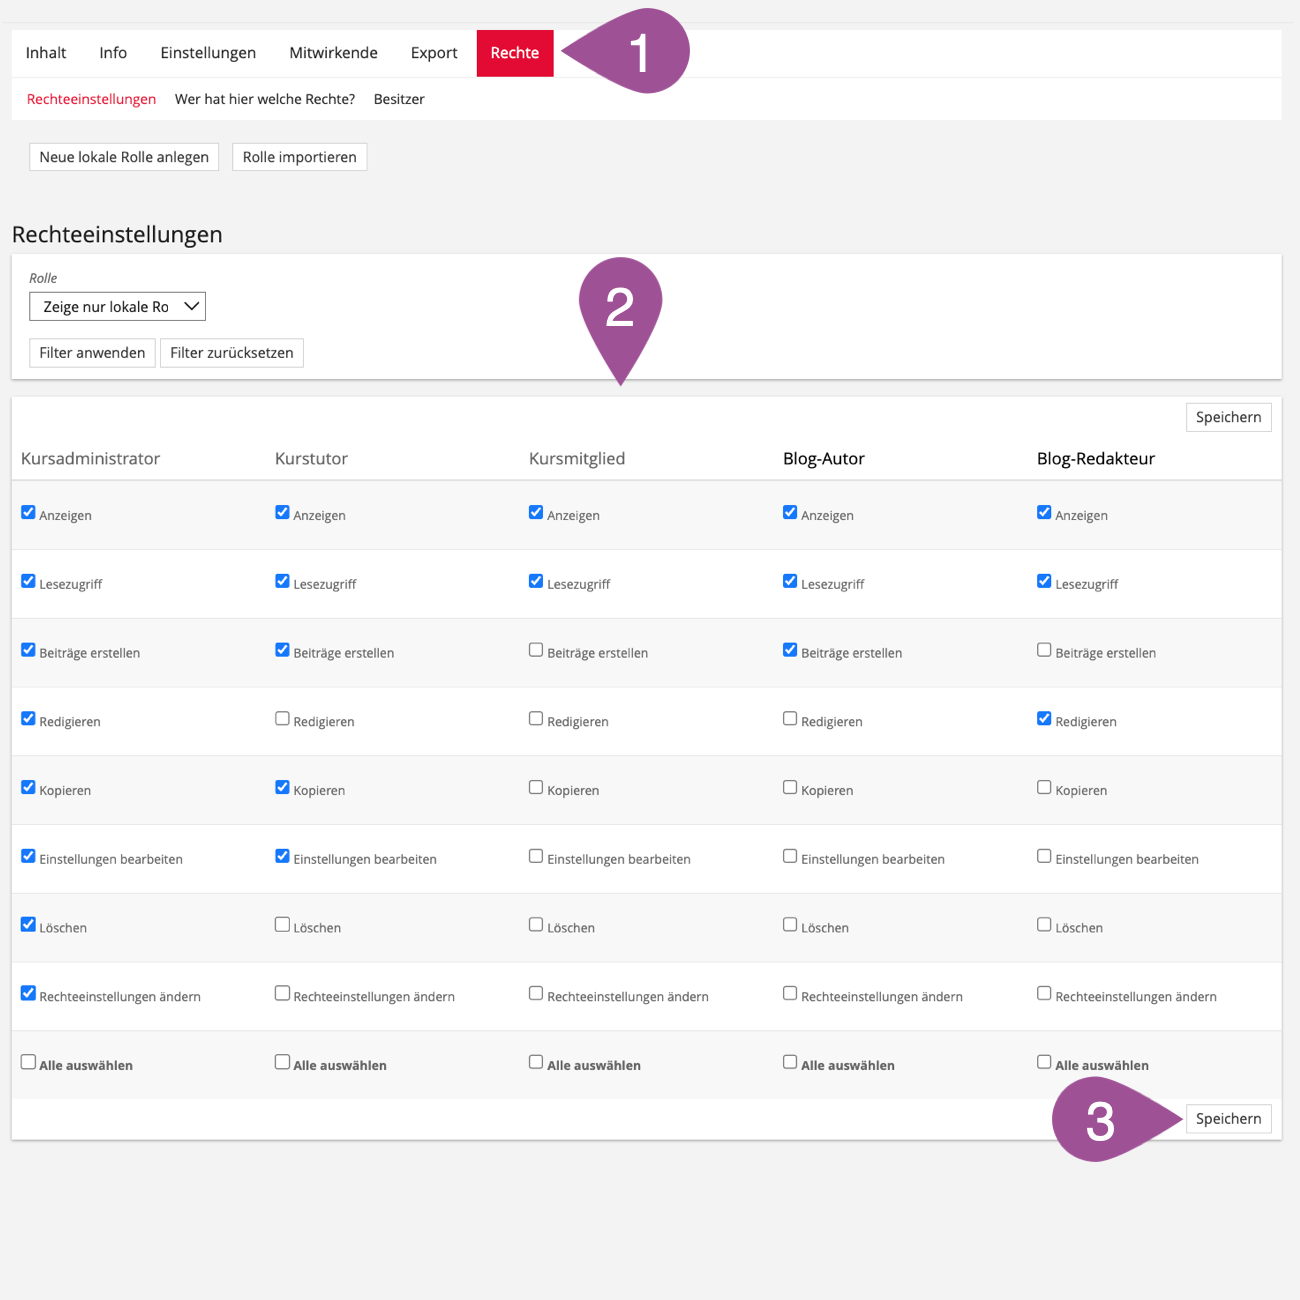
Adjust permissions
You can specify which permissions blog authors and blog editors have. Suppose you want all students to contribute to a blog. In that case, you can collectively give all course members the appropriate permissions and bypass role assignments (see 4.1 Add contributors).
To adjust permissions, you have to be in edit mode (see 2. Switch between preview mode & edit mode). Follow the steps below:
| In edit mode, go to the «Permissions» tab. |
| To give permissions, check the relevant function in the corresponding column. To revoke permissions, remove the checkmark. Note that the «Redact» permission always includes the permission to create posts, even if the «Contribute» permission has not been granted separately. |
| «Save» your settings. |
.
5. Create & manage posts
To create and manage posts, you first have to switch to the edit mode (siehe 2. Switch between preview mode & edit mode). Afterwards you can add posts, define keywords, edit posts, publish posts and delete posts.
.
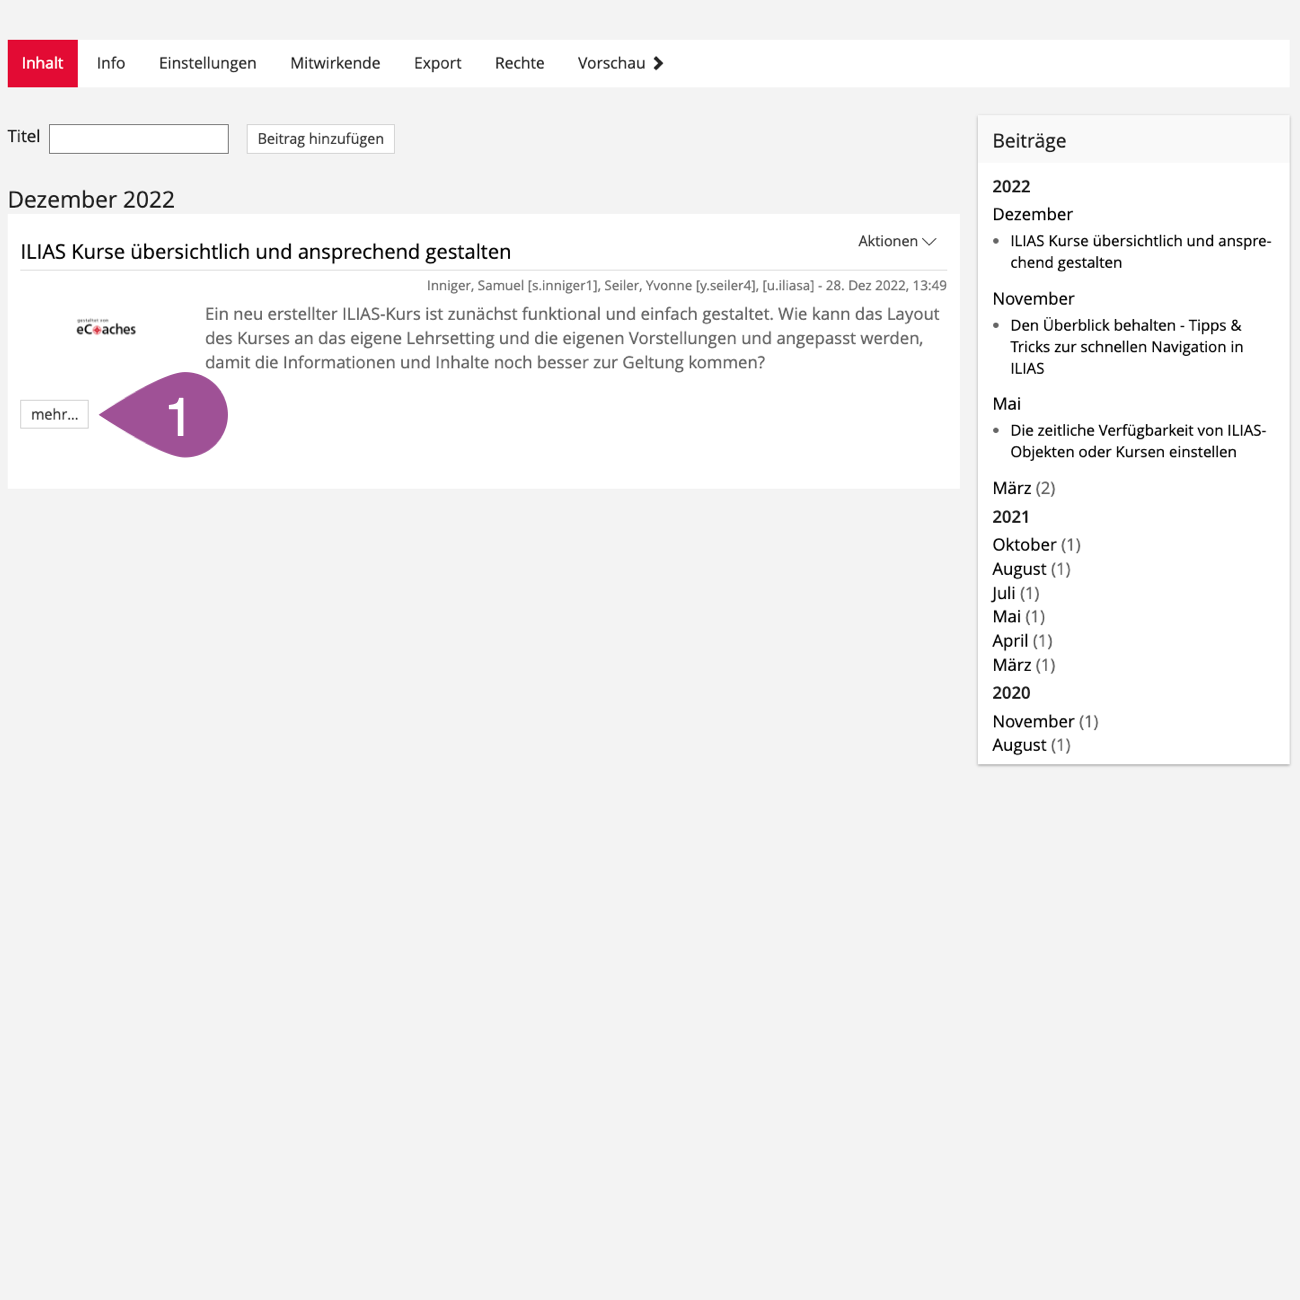
Add a post
| In edit mode, go to the «Content» tab. |
| Give your post a title. |
| Click on «Add Posting». You will be redirected to the page editor, where you can add content and design your post (see also Manual: Page Editor). A post with a red frame is not yet published and, therefore, only visible to administrators, authors, and editors. For the post to be visible to everyone, it must be published. (siehe 5.4 Publish a post). |

.
Define keywords for a post
If you have checked the «Keywords» option in the settings (see 3.1 Configure settings), you can assign keywords to each post, which can be used to categorize posts thematically and to identify links to similar posts.
| In edit mode, open the post's actions menu. |
| Select «Edit Keywords». |
| Enter a keyword. Press Enter to add more keywords. If a keyword has already been used in another post, this keyword will be suggested. |
| Save your keywords. |

.
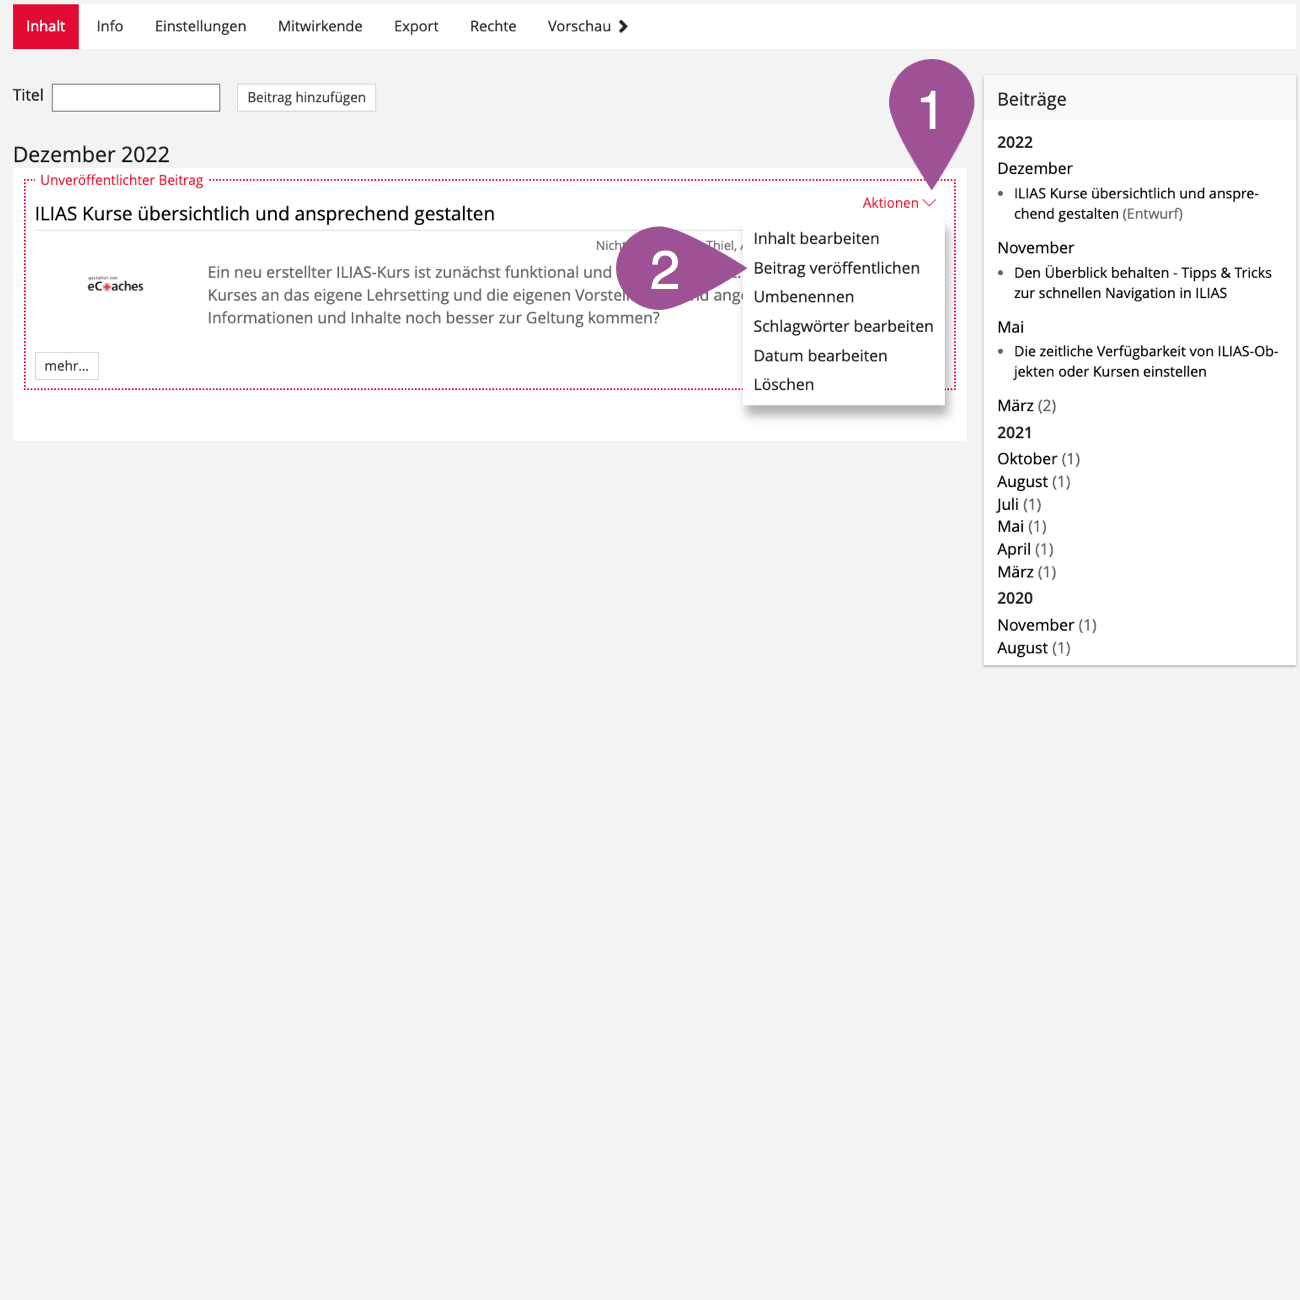
Edit a post
| In edit mode, click on «more...». A post with a red frame is not yet published and, therefore, only visible to administrators, authors, and editors. For the post to be visible to everyone, it must be published. (siehe 5.4 Publish a post). |
.
Publish a post
Je nach Einstellungen, müssen neue Beiträge freigeschalten werden, bevor sie anderen angezeigt werden (siehe 3.1 Configure settings).
| In edit mode, open the post's actions menu. |
| Select «Publish Posting». |
.
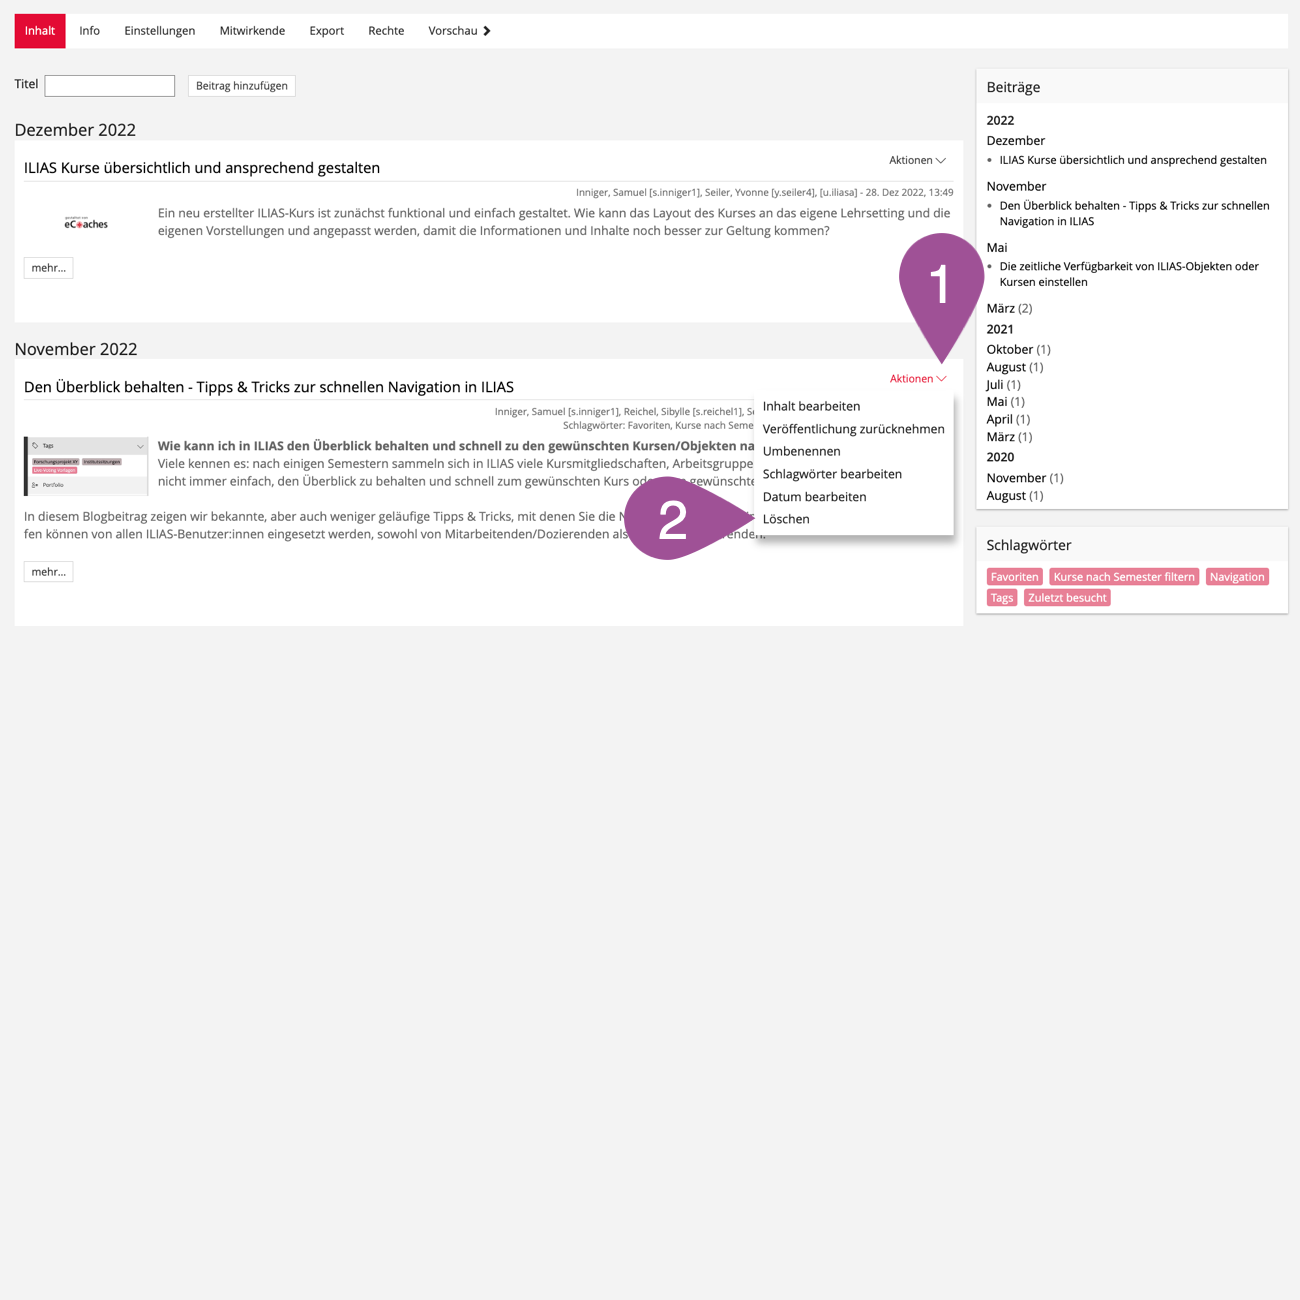
Delete a post
| In edit mode, open the post's actions menu. |
| Select «Delete». |
.
6. Enable notifications
You can be notified about changes and news in the blog. There are two ways to do this: An email notification via ILIAS and notifications via an external RSS feed.
.
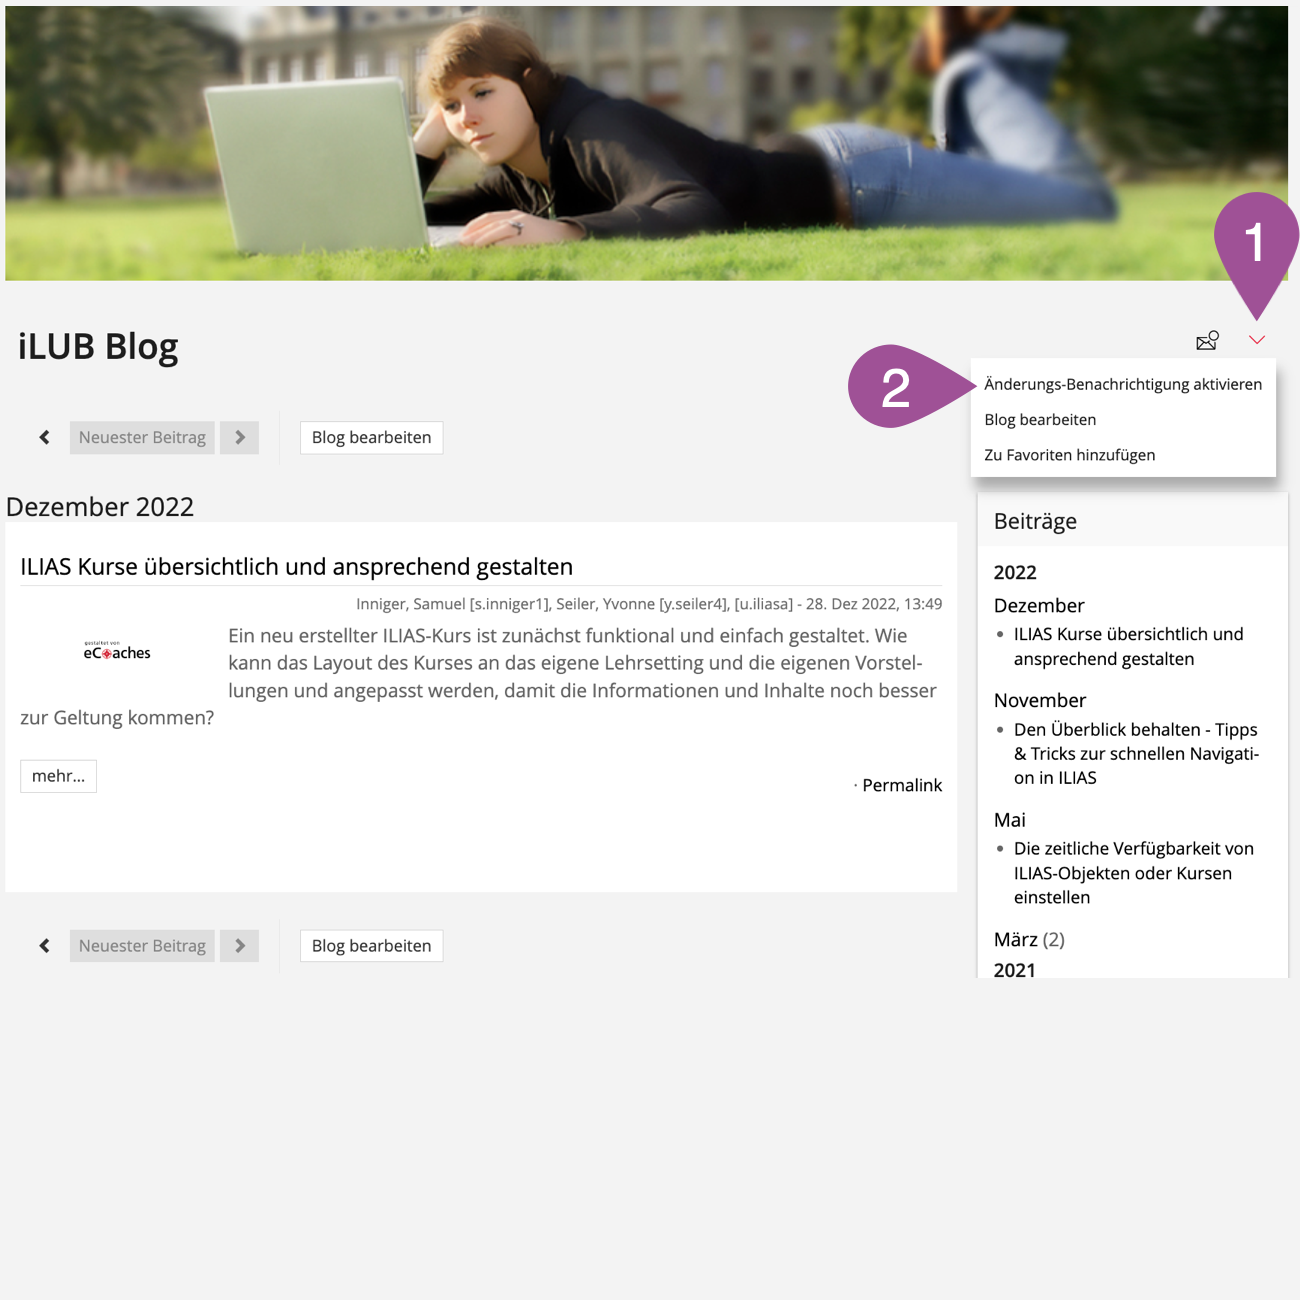
Email notifications via ILIAS
To (de)activate email notifications for the blog, you first have to switch to preview mode (see 2. Switch between preview mode & edit mode).
| In preview mode, open the blog's actions menu. |
| Select «Activate Notifications». |
.
Notifications via external RSS feed
If the option «Activate RSS» has been checked in the «Settings» (see 3.1 Configure settings), the blog can be subscribed to as an RSS feed using an RSS reader (browser or separate program).
.
7. Application scenarios
The following pages will give you an idea of how a blog can be used:
Zuletzt geändert: 5. Sep 2025, 09:54, Thiel, Anja [a.thiel5]