


ILIAS Support (English)
Reiter
Manual: Media Pool
Deutsch | English
Manual: Media Pool
In a media pool, image, audio & video files can be stored and administered for repeated use. Since media pools are usually only visible to course and group administrators and tutors, it is not suitable for playback or sharing media with members. Use other items like the "Video (Opencast Series)" for this purpose (see Item description, Manual: Opencast Serie).
1. Create a media pool
2. Adjust the settings of the media pool
3. Create objects
3.1 Create a folder structure
3.2 Upload media
3.3 Create content snippets
4. Adjust the settings of a media object
4.1 Update or replace a media object
4.2 Adjust the size of a media object
4.3 Link an image area
5. Add objects from a media pool to a page
6. Application scenarios
.
1. Create a media pool
 | Click on «Add New Item» |
 | Select «Media Pool». |
 | Give the media pool a «Title». |
 | Click on «Add Media Pool». |


.
2. Adjust the settings of the media pool
| Go to the «Settings» tab. |
| If you want all your media objects to be automatically resized to a fixed size (see 4.2 Adjust the size of a media object), when you upload them, you can define the default height and width. Automatic resizing only works for single media uploads, not for bulk uploads (see 3.2 Upload media). |
| Under «Tile Image» you can upload a tile image for the media pool. This will be displayed in the container object (course, group or folder) in which the media pool is located if the «Tile View» is activated for this container (see also Manual: Course, Manual: Group, Manual: Folder). When inserting images, please follow the recommended image sizes (see Notes on image sizes on ILIAS). When you update a tile image, the container object may continue to display the old tile image because it is stored in the browser cache. To see the new tile image, you have to delete the browser cache: Firefox Safari Microsoft Edge |
| «Save» your settings. |

.
3. Create objects
In a media pool, you can create folders, media objects and content snippets.
Always make sure that you create objects in the correct location in the media pool, as they cannot be moved to a different location in the media pool later.
.
Create a folder structure
| Go to the «Content» tab. |
| Click on «Create Folder». |
| Give the folder a «Title». |
| Click «Save». Repeat the process until you have created the desired folder structure. You can also nest folders. You can view the folder structure of your media pool as a tree view by opening the «Tools» menu (top left corner). |


.
Upload media
| Go to the «Content» tab and, if necessary, to the desired target folder. | ||||
| You have two options for uploading media:
|


.
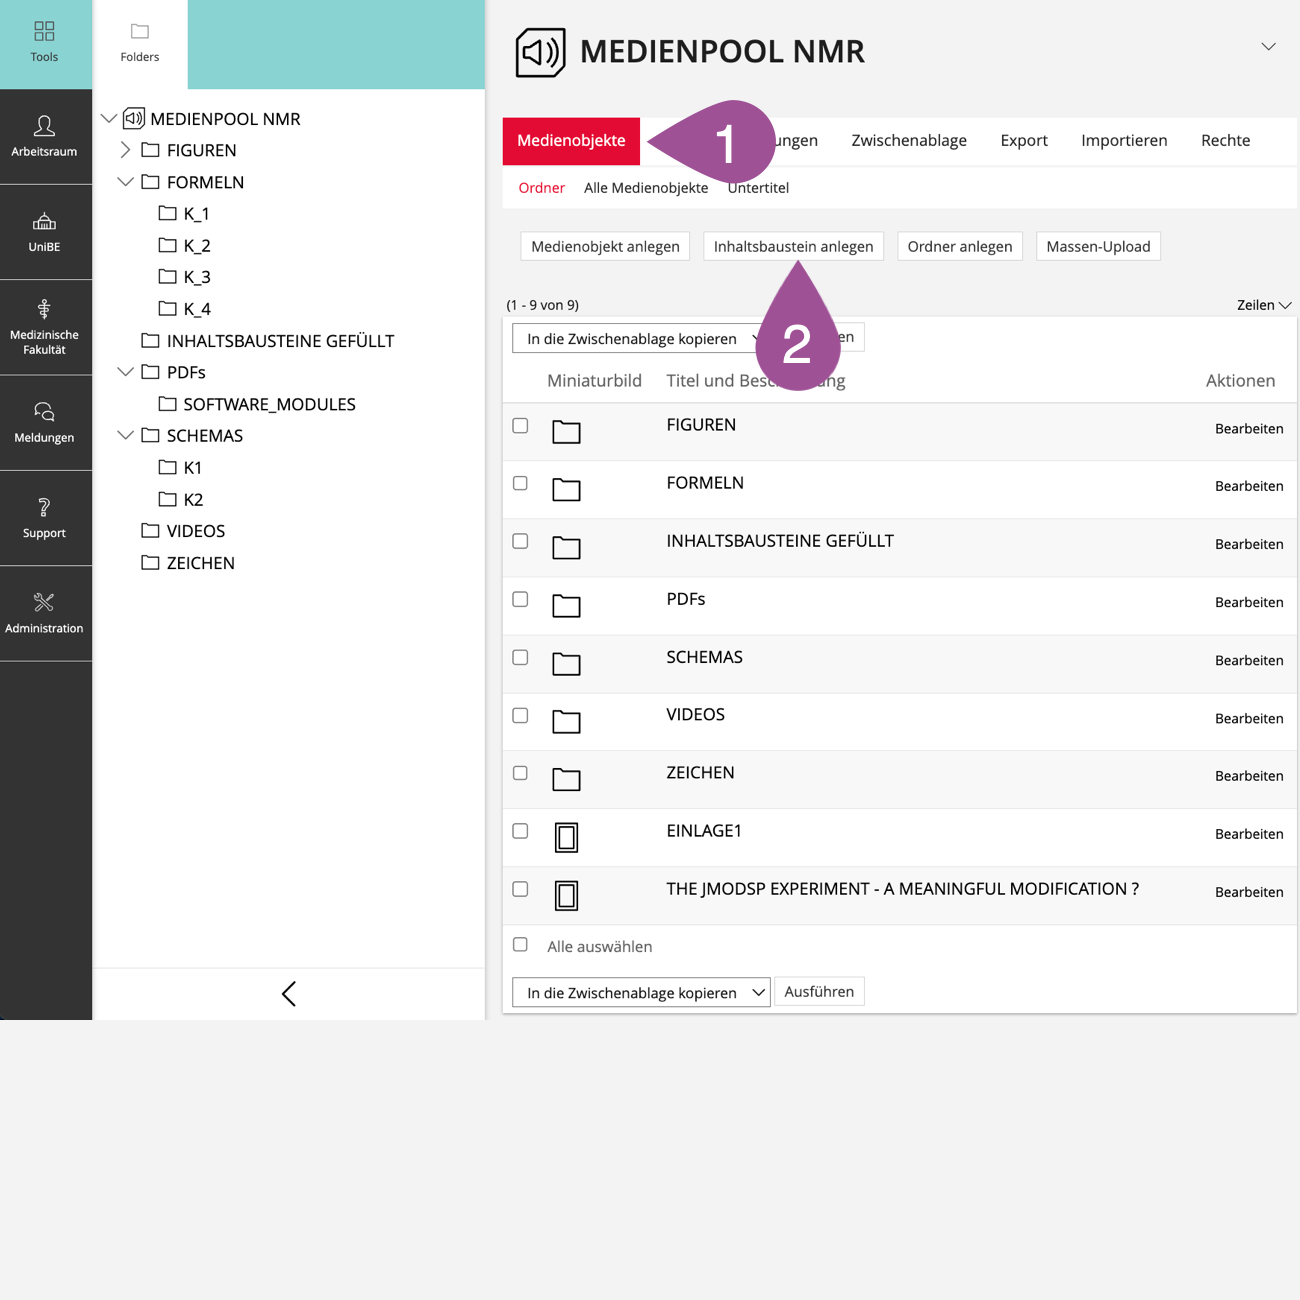
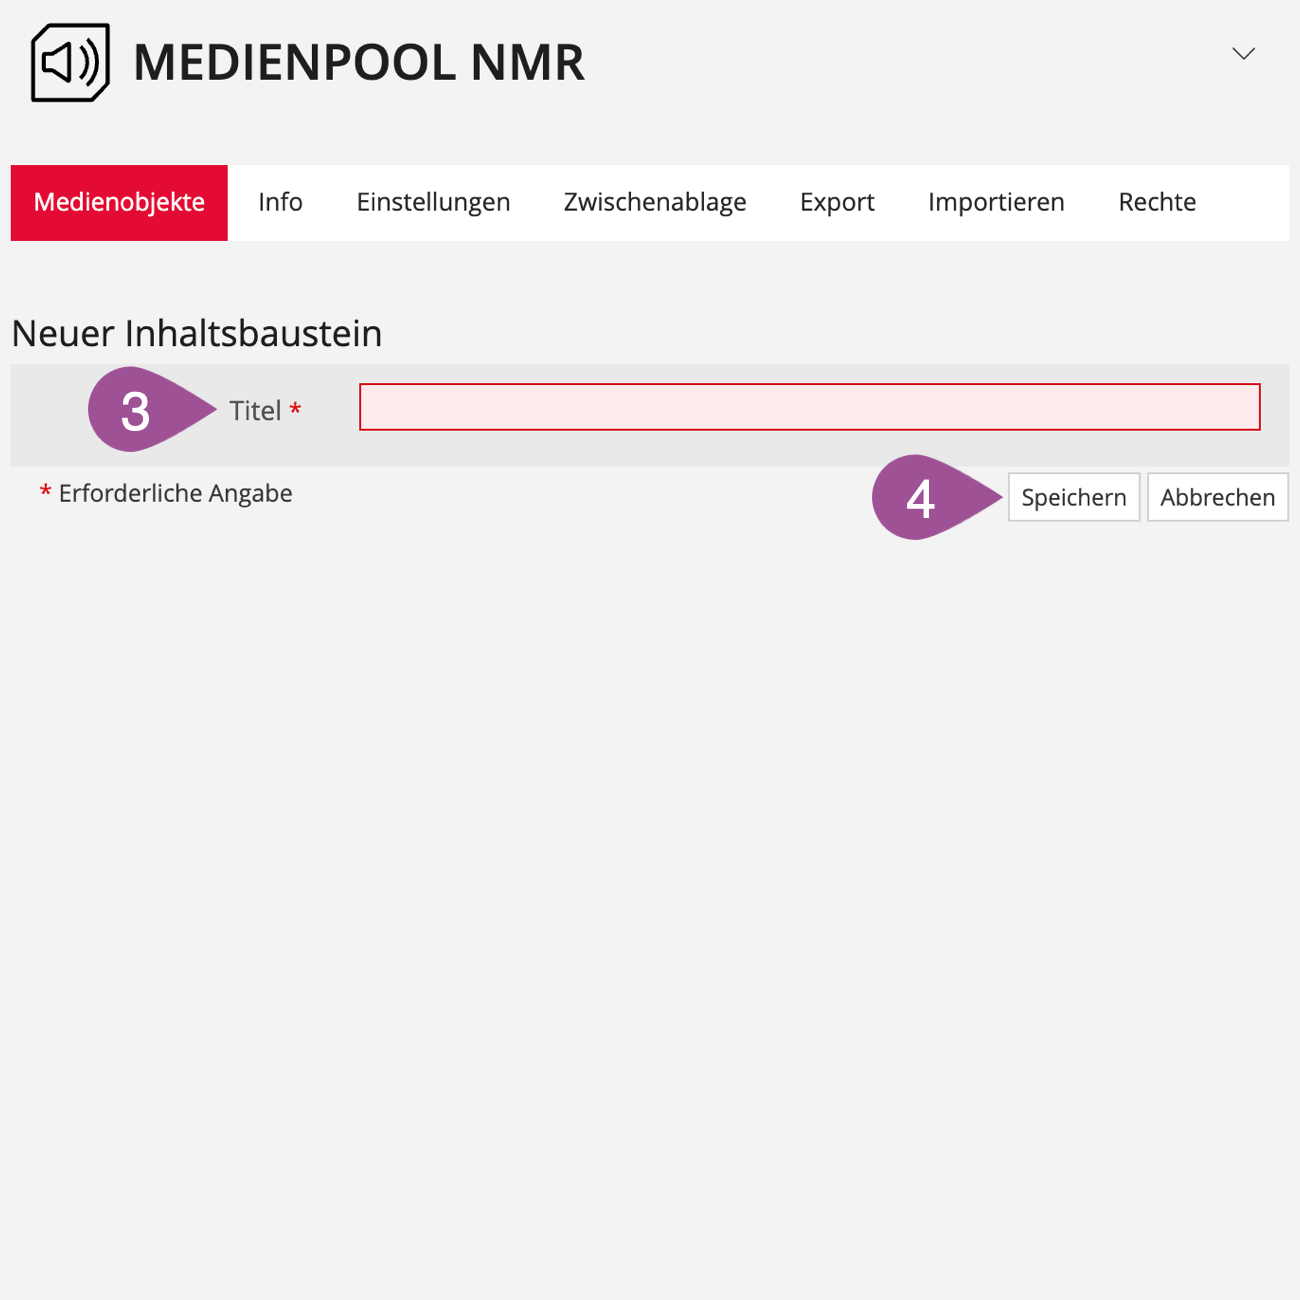
Create content snippets
Content snippets are page elements that can be integrated into any page via the page editor. They are created in the media pool and can only be modified in the media pool using the page editor. On pages on which a content snippet is included, the snippet cannot be edited.
| Go to the «Content» tab and, if necessary, to the desired target folder. |
| Click on «Create Content Snippet». |
| Give the snippet a «Title». |
| Click «Save». This opens the page editor, with which you can design the content snippet (see Manual: Page Editor). The title of the content snippet appears as a heading in edit mode. However, it is not displayed when the content snippet is added to a page. |
.
4. Adjust the settings of a media object
.
Update or replace a media object
You can upload a new version for a media object already created in the media pool or replace the object with a new one. If the object is included in one or more pages, it is automatically updated to the latest version or replaced by the new object.
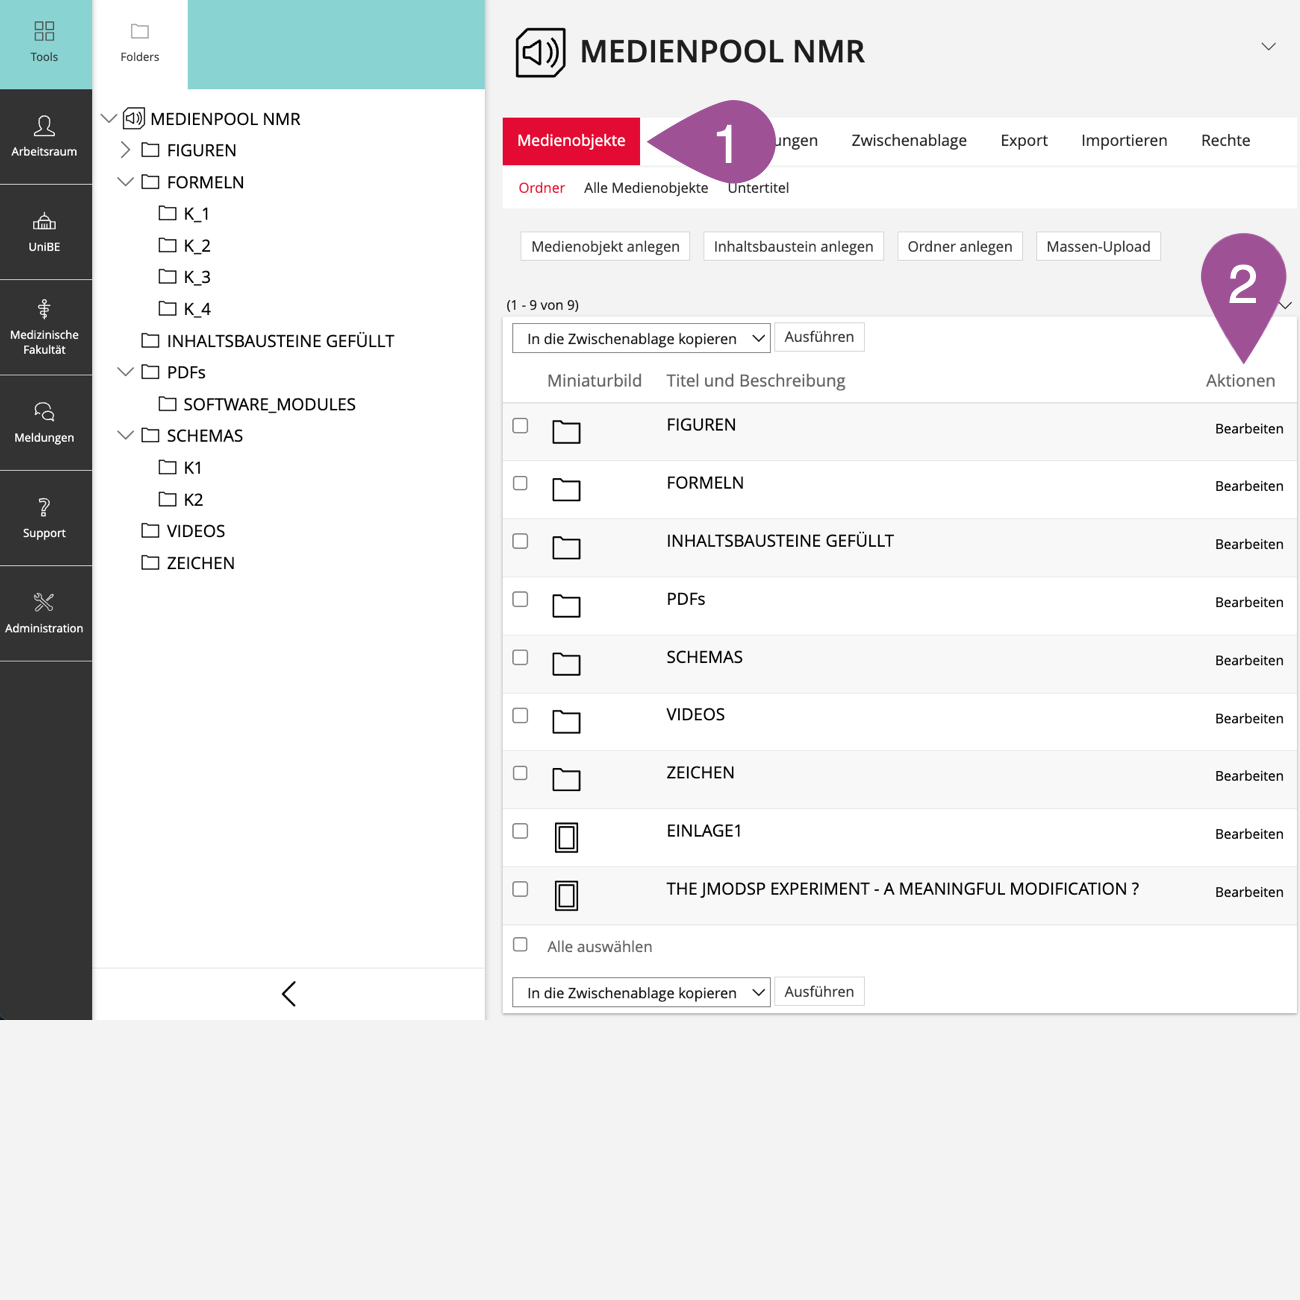
| Go to the «Content» tab. |
| In the «Actions» column, click «Edit» for the corresponding media object. |
| Click «Select File» and select the current version or new file. If full-screen view is enabled for the media object where it is embedded in a page, you have to select the «Use the same resource as above» option under «Full Screen» and «Ressource» before saving. Otherwise, the earlier version is displayed in full screen. |
| «Save» your settings. |


.
Adjust the size of a media object
The display size of a media object set in the media pool is adopted by default when the media object is added to a page. However, the size of the object can be individually adjusted via «Instance Properties» at each location.
| Go to the «Content» tab. | ||||
| In the «Actions» column, click «Edit» for the corresponding media object. | ||||
| Choose one of the two options under «Size»:
| ||||
| «Save» your settings. |


.
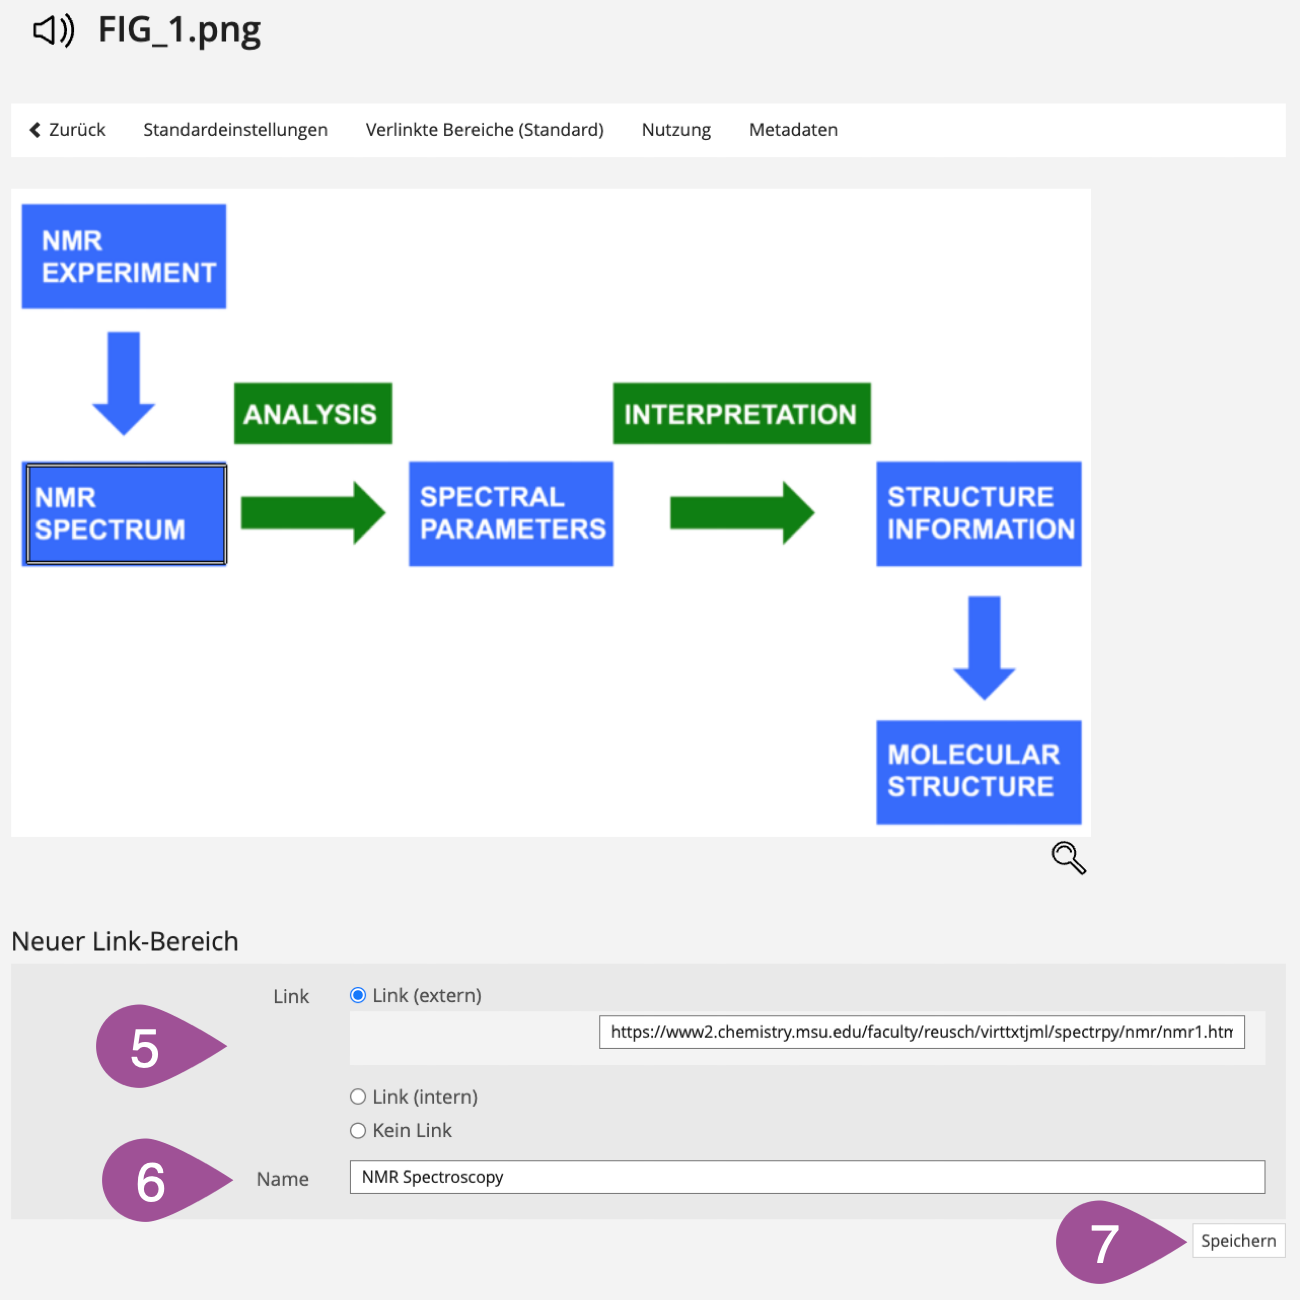
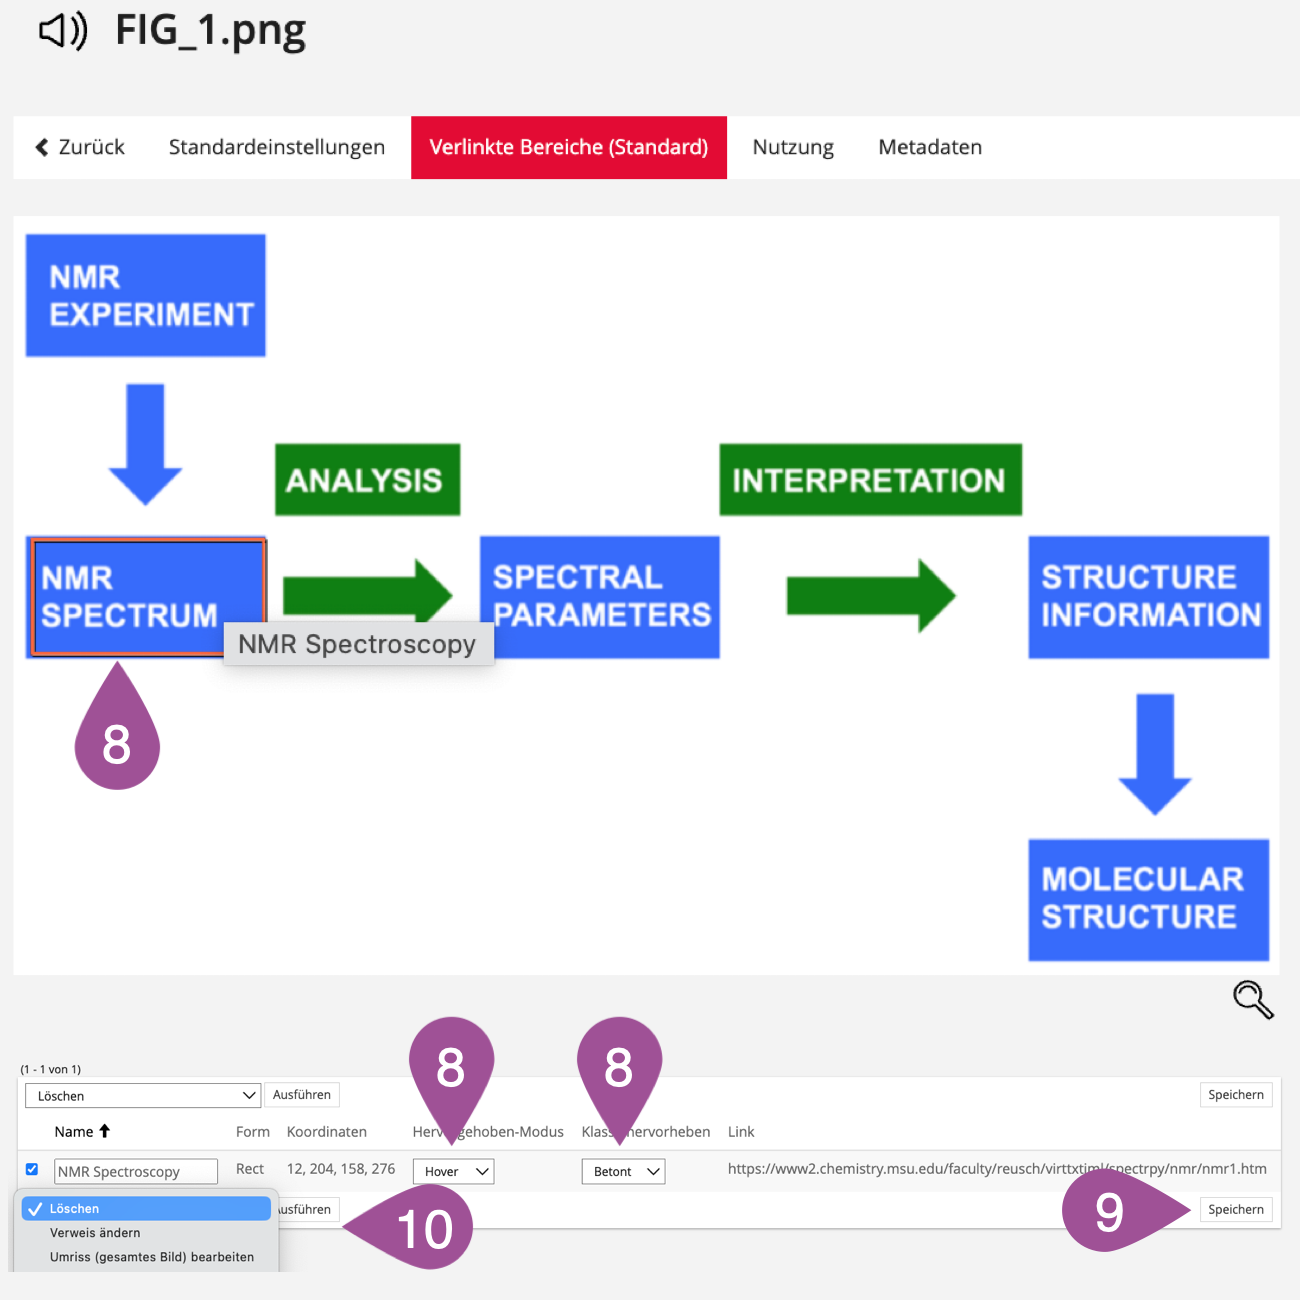
Link an image area
You can link areas of an image or an entire image to internal or external pages. In order to do this, the image has to have a fixed size (see 4.2 Adjust the size of a media object).
| Go to the «Content» tab. | ||||||
| In the «Actions» column, click «Edit» for the corresponding media object. | ||||||
| Go to the «Default Link Areas» tab. | ||||||
| Under «Shape», select whether the entire image or only a section in the form of a rectangle, circle or polygon should be linked and click «Add Area».
| ||||||
 | Choose whether you want to set an external or internal link and enter the URL (external) or select the desired ILIAS target object (internal). | ||||||
 | Give the link a «Title». | ||||||
 | Click «Save». | ||||||
 | You can choose whether and how to highlight the linked area on the image:
| ||||||
 | «Save» your settings. | ||||||
 | To delete or change a link, select the corresponding link, choose the desired option from the drop-down menu, and click «Execute». |


.
5. Add objects from a media pool to a page
You can add media objects and content snippets from a media pool wherever you can customize a page using the page editor. For details, see the Manual: Page Editor.
.
6. Application scenarios
The following pages will give you an idea of how a media pool can be used:
Zuletzt geändert: 5. Sep 2025, 09:36, Thiel, Anja [a.thiel5]