ILIAS Support (English)
Reiter
Manual: Item Group
Deutsch | English
Manual: Item Group

.
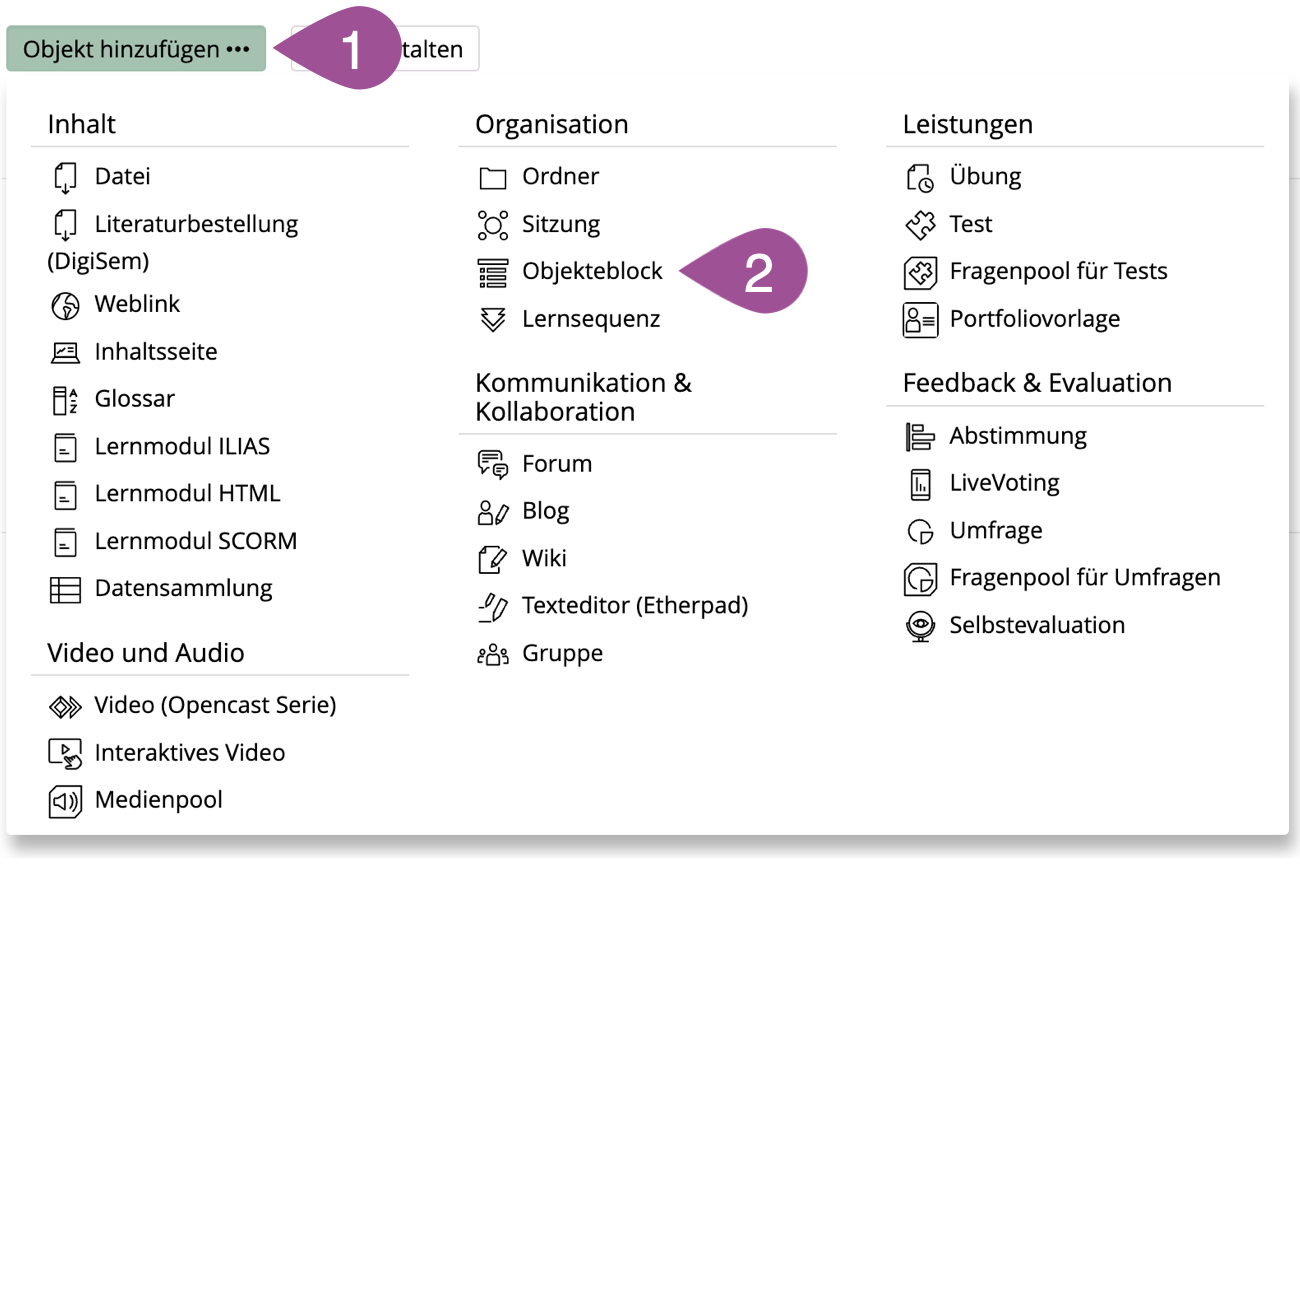
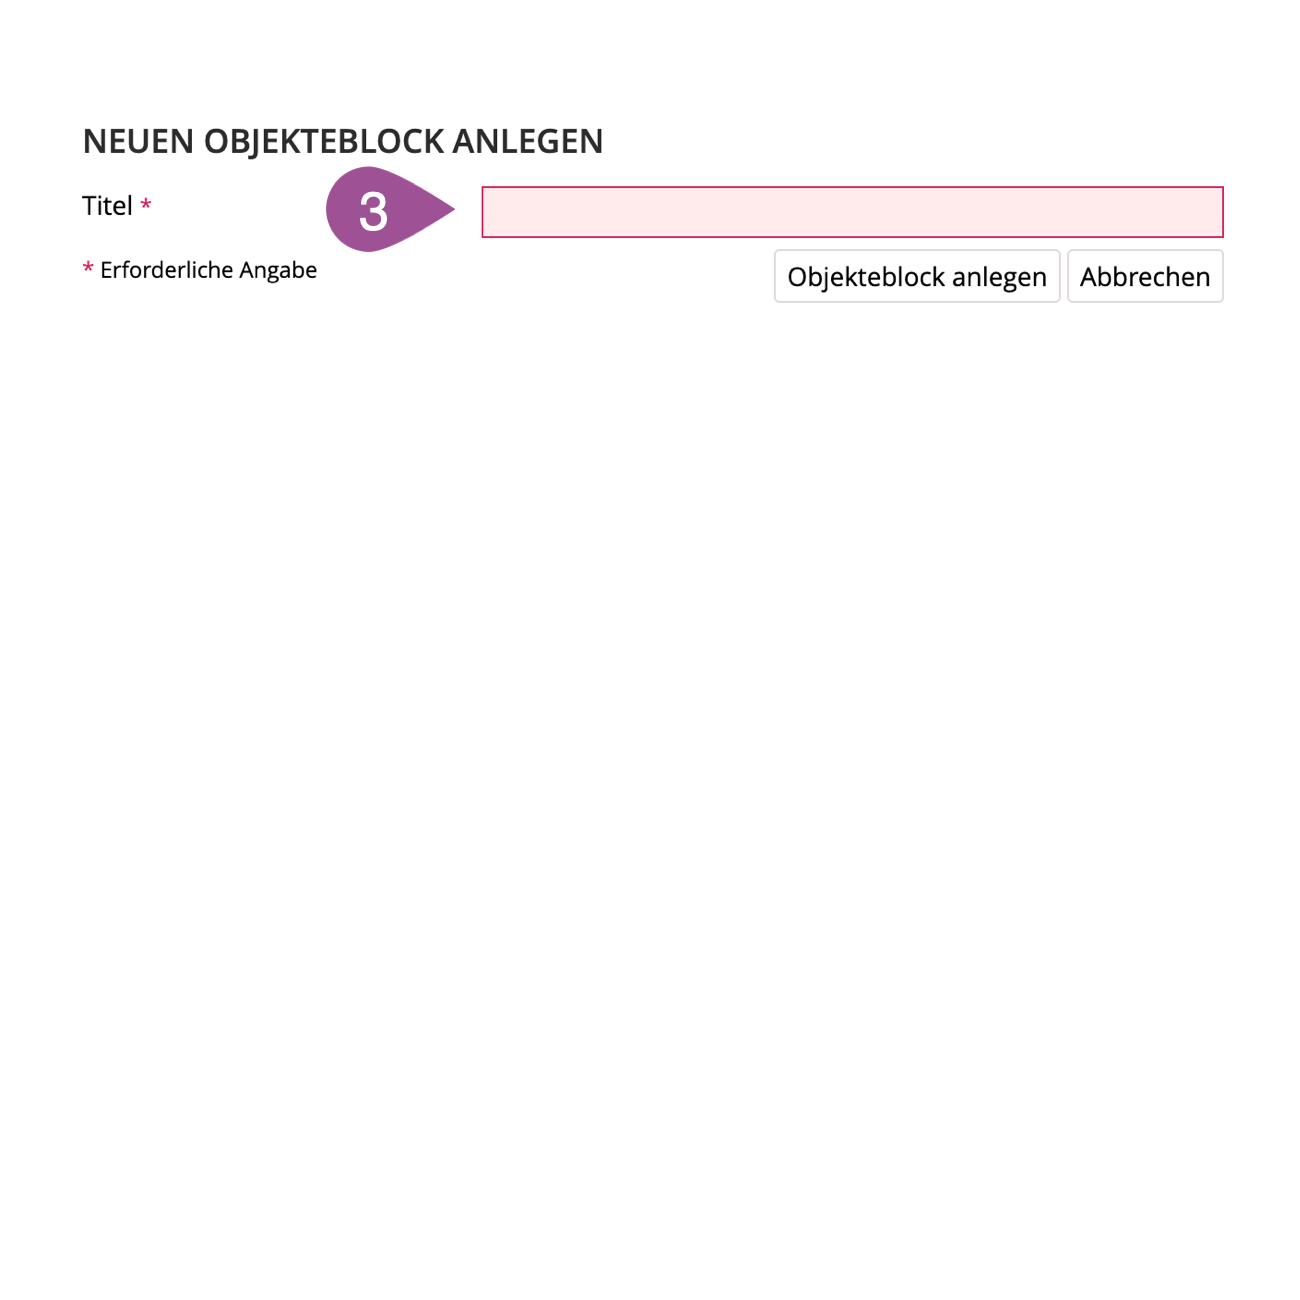
1. Create an item group
.
2. Add & remove items
You have two options for adding items to an item group. You can either integrate (and remove) already existing items or create new items that will be placed in the item group.
.
Integrate already existing items & remove items
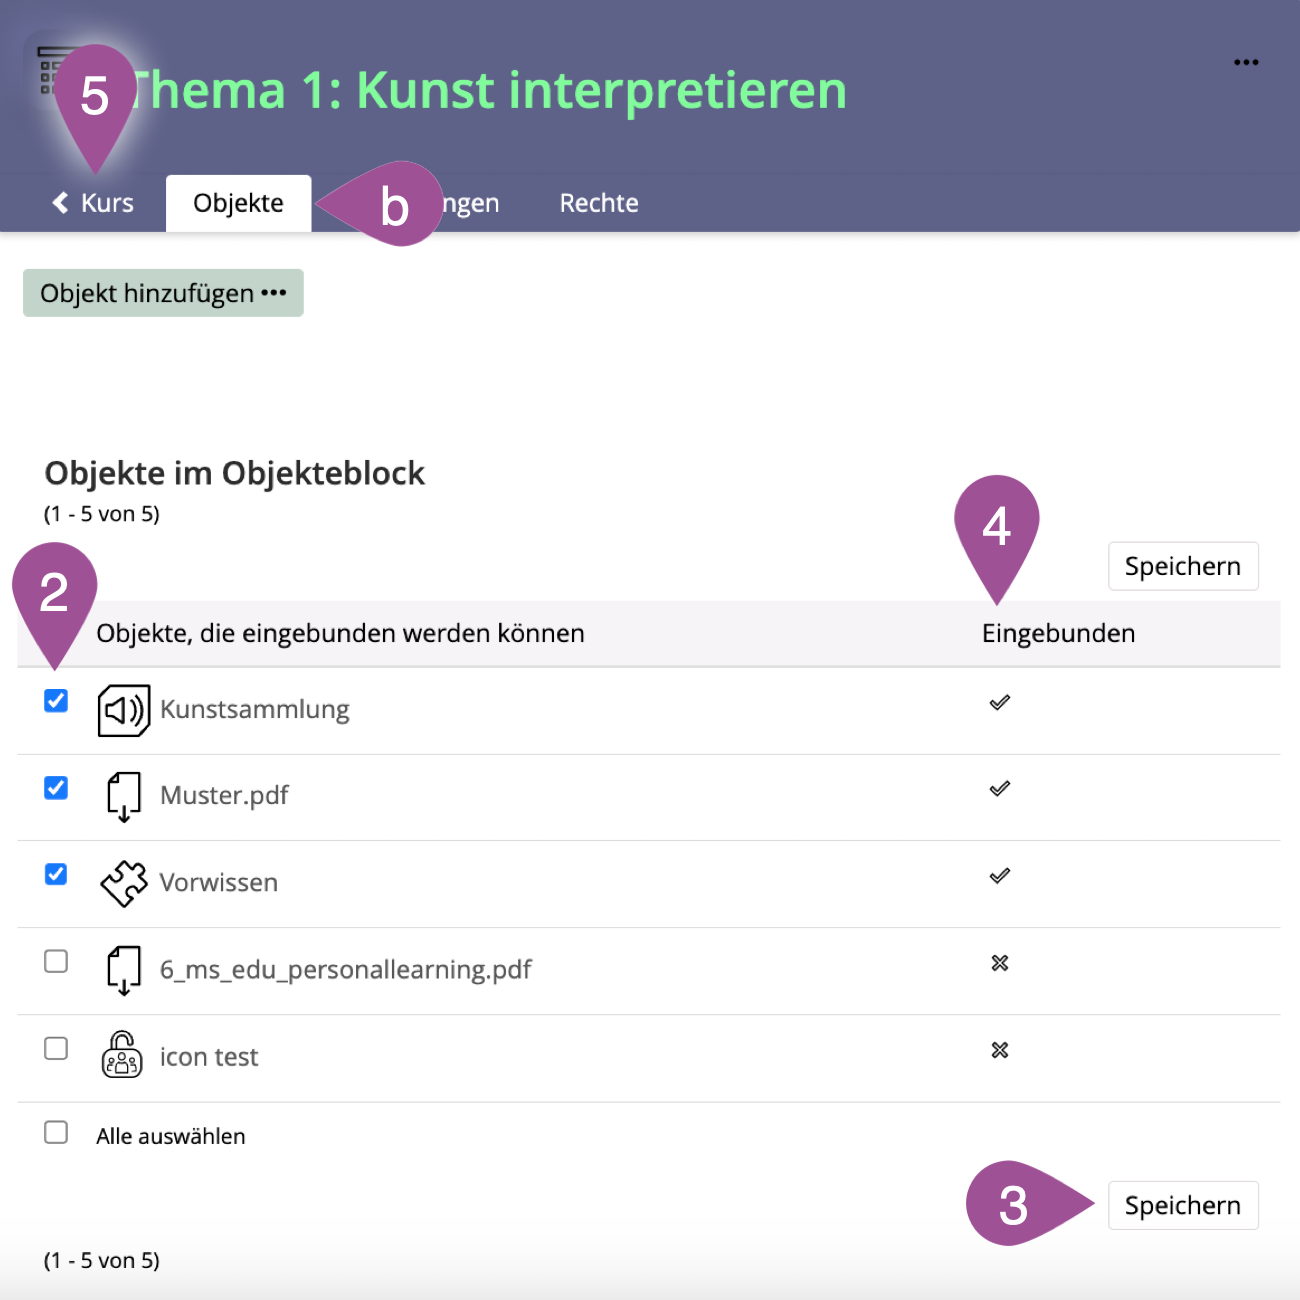
Go to the item group's «Materials» tab:
| |||||
The list shows you all the items that exist in the container object where the item group was created. Select the items you want to include in the item group. For items that you want to remove, uncheck the checkbox. The «Delete» option in an item’s actions menu removes the item from the item group and deletes it irrevocably. | |||||
«Save» your selection. | |||||
In the «Assigned» column, you can see which of the items are included in the item group and which are not. | |||||
To view the item group, on the parent container (e.g., «Course») in the upper left corner. |
You can assign an item to several item groups.
.
Add new items
Go to the item group's «Materials» tab:
| |||||
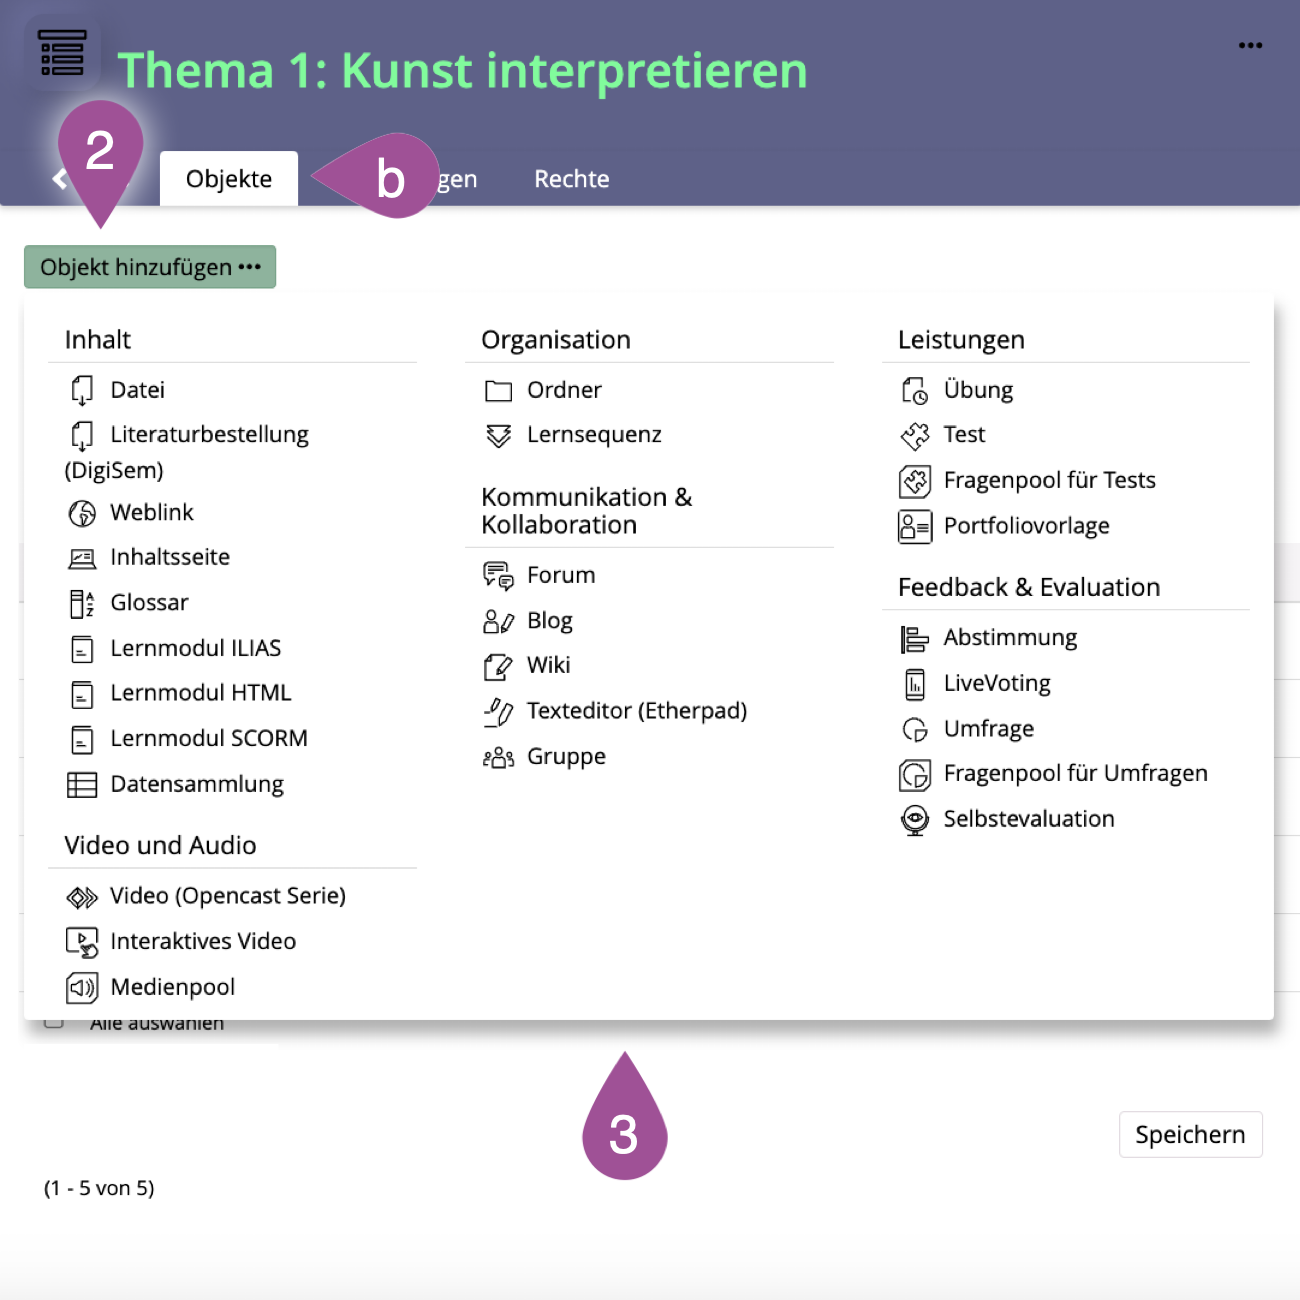
Click on «Add Object». | |||||
Click on the item you want to start setting it up. |
.
3. Adjust the appearance of an item group
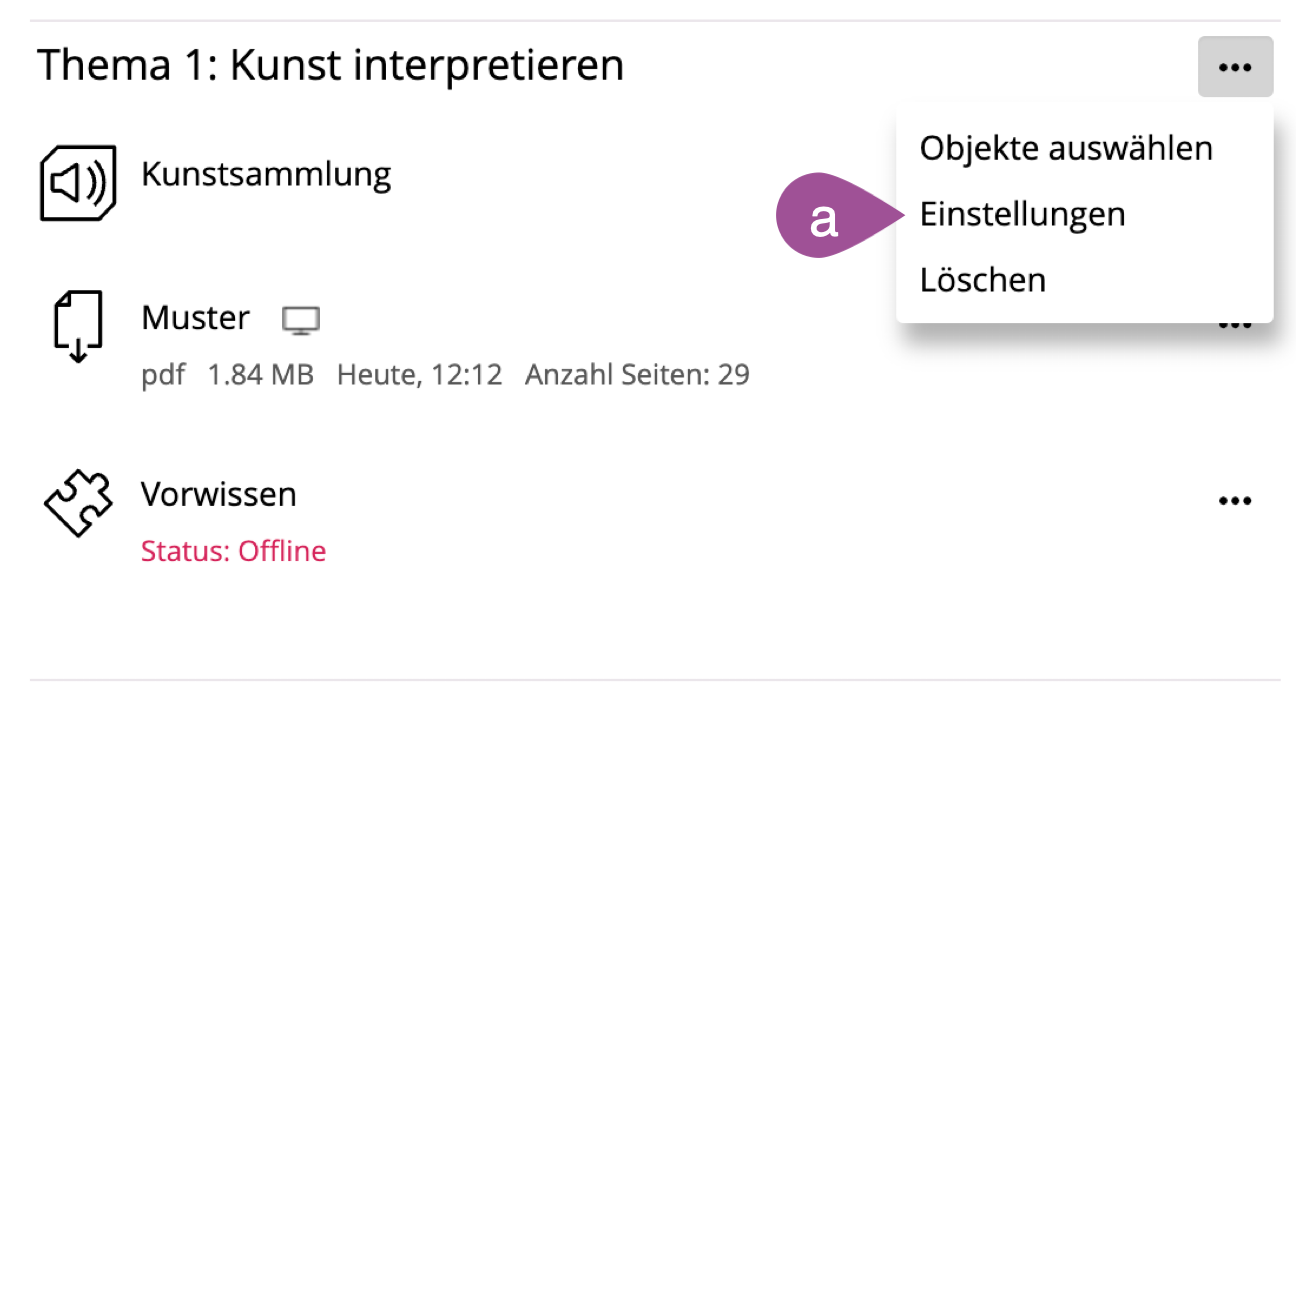
Go to the item group's «Settings» tab:
| |||||
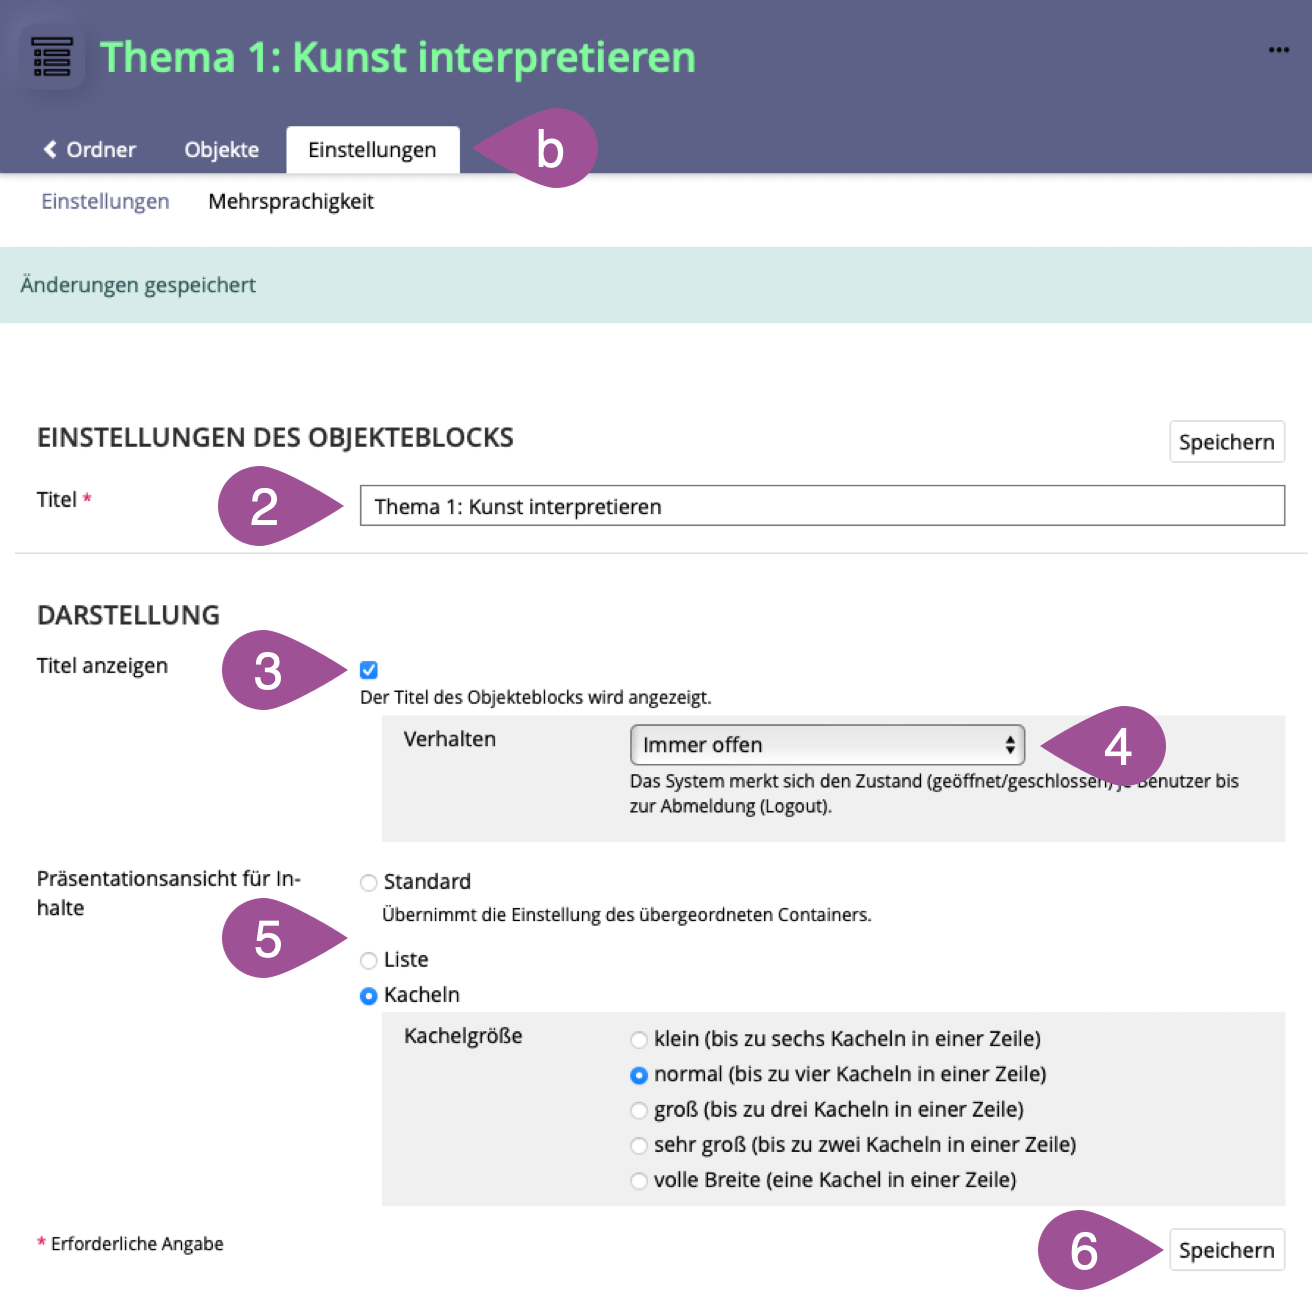
You can change the title of the item group. | |||||
You can choose whether to display the title of the item group or not. | |||||
If the «Show Title» option is checked, you can choose the item group's «Block Behavior».
| |||||
Choose the «Tile» item presentation and an appropriate size if you want the item group's content displayed as tiles instead of a list (see also Manual: Tile design). | |||||
«Save» your settings. |
If you have created a layout using the Page Editor, item groups and their contents can be integrated into this layout (see "Manual: Page Editor").
Manual: Page Editor
.
4. Delete an item group
You cannot delete the default «Content» item group. However, you can always delete item groups that you have created manually. Follow the steps below to do so:
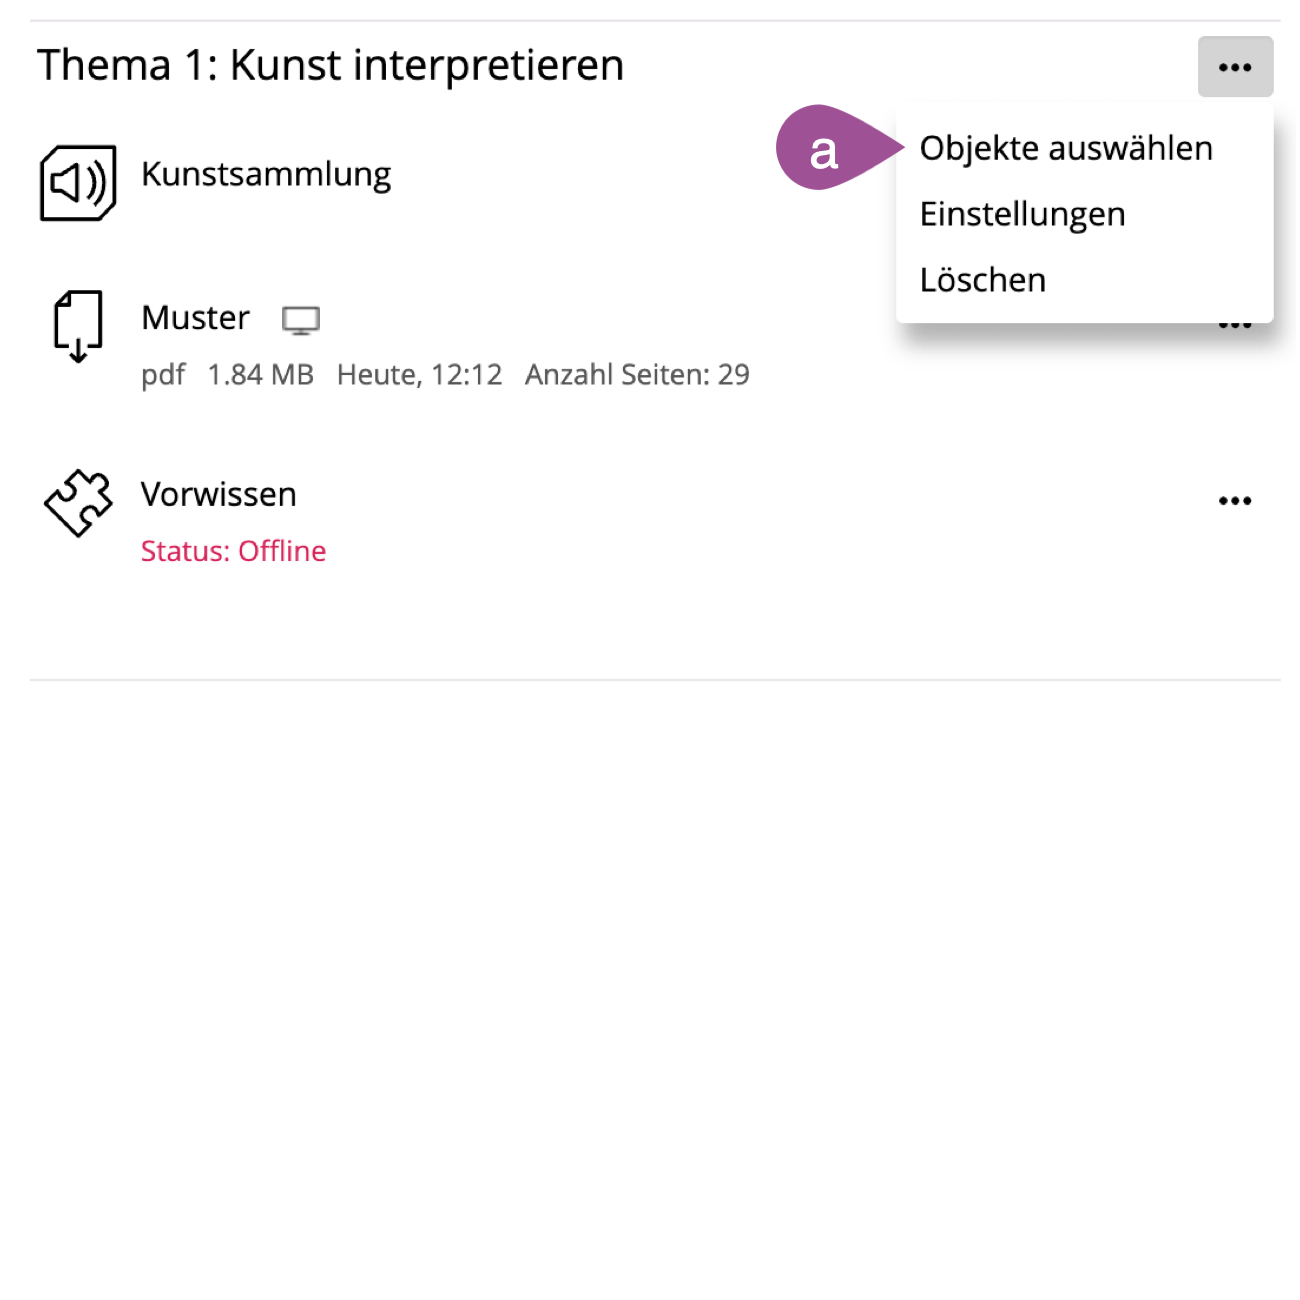
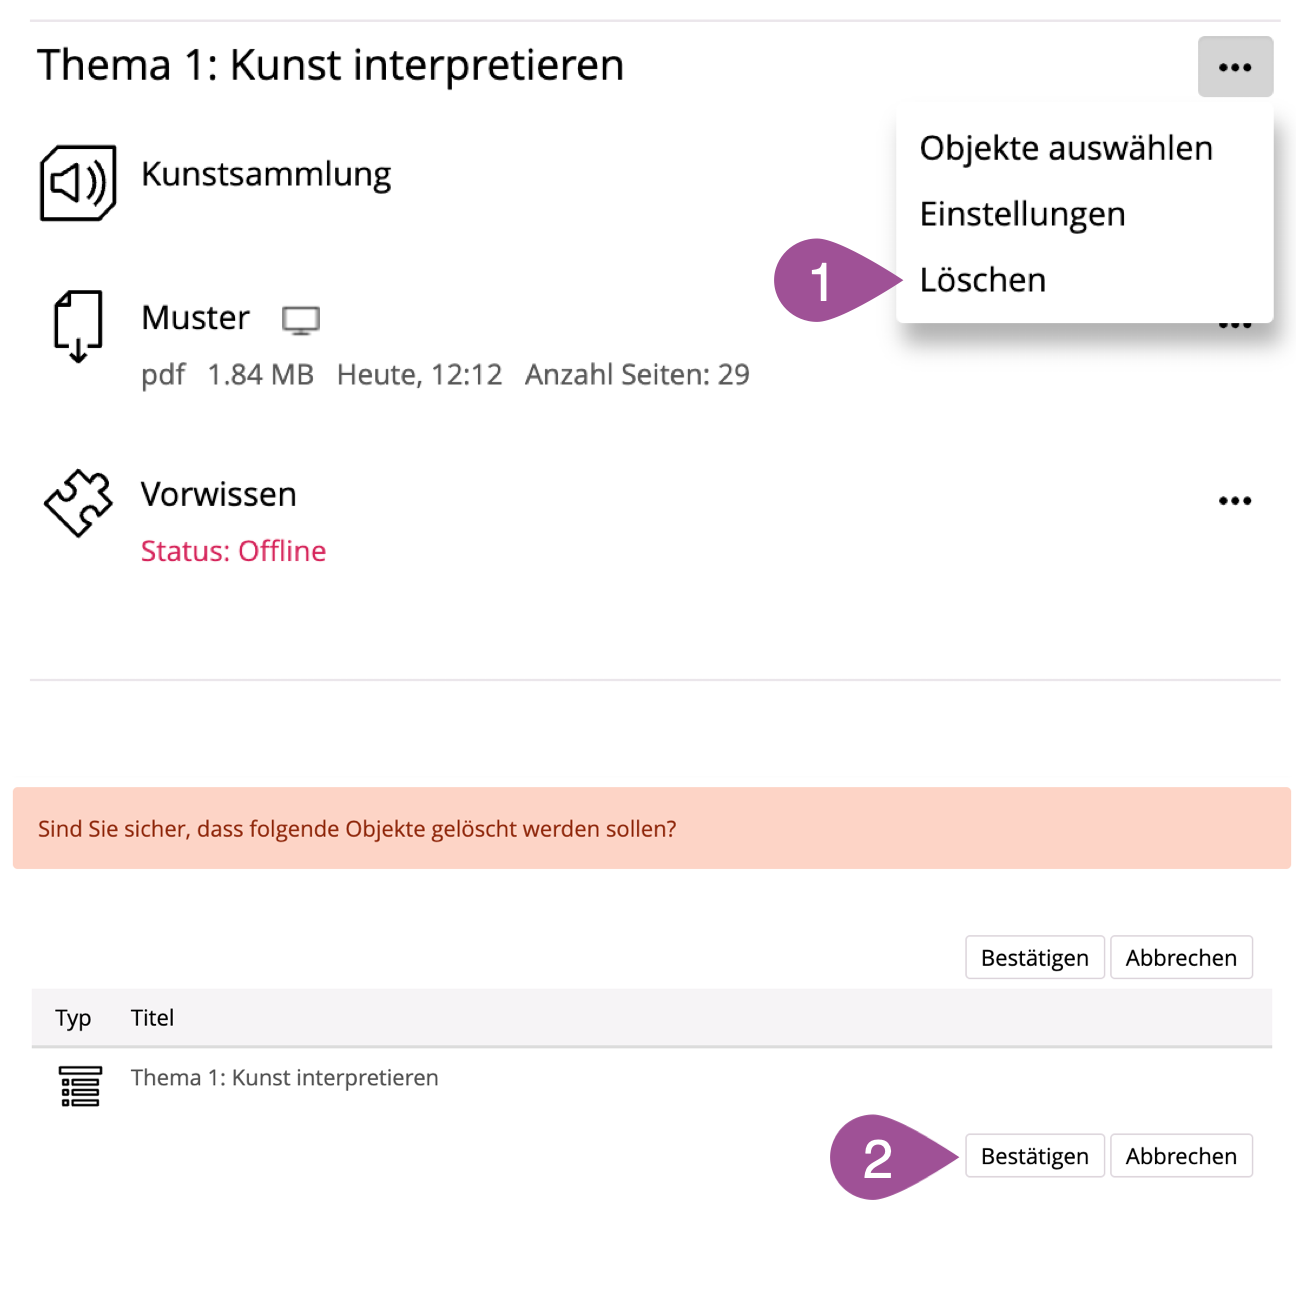
Open the item group's actions menu and select «Delete». | |
«Confirm» that you want to delete the item group. The items that are included in the item group will not be deleted. Instead, they are reassigned to the default «Content» item group. |
.
5. Application scenarios
The following pages will give you an idea of how an item group can be used:
Zuletzt geändert: 5. Sep 2025, 09:05, Thiel, Anja [a.thiel5]

